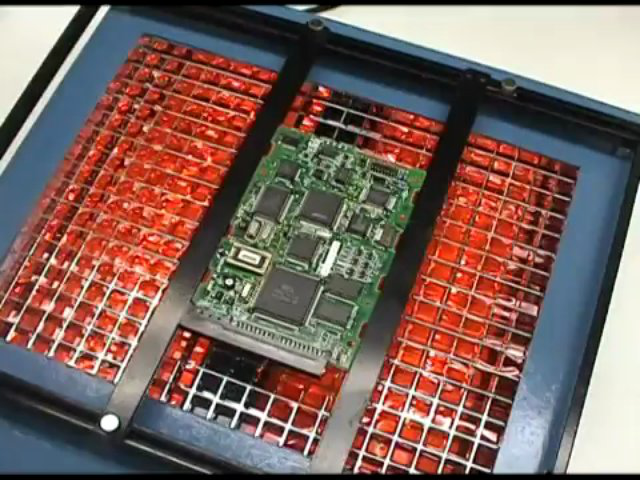
Purchasing a PCB preheater workstation is exceptionally costly. It includes operations that involve the use of high current and AC line voltage.
This article aims to show how a circuit to PCB workstation for preheating operates with no extraordinary materials and apparatus acquired from different outlets.
But a statutory warning! Take caution when working with AC. It is risky and can endanger one’s life.
1.Your Shopping List
The things you would need are Plywood, Heat Gun, Three Pong, Pipefitting with a Copper Elbow, a Square Tubing, Machine Screw, Washers, and Nuts.
It would help if you also had the equipment to hold down the Clamp. For this, you can use Cord Wire. Then it would help if you had a Wire Terminal and a Wire Nut.
The circuit has a low current side that requires a wire with a lower gauge to use the fan. It would help if you also had a Steel Strap roll, Hole Saw, Q4015LT Triac, or Diac.
The Heat Sink requires a bolt and nut for fastening the heat sink. one uF Capacitor, a Resistor of half watt variable resistor for the Potentiometer, a Variable Resistor of 1/2 watt. Finally, a strip of Terminal connector composed of four wires, a Terminal strip comprising five wires, 12 Volts Direct Current Fan of dimensions 60 centimeters by 60 centimeters by 25 centimeters, and a Knob to fit potentiometer shaft.
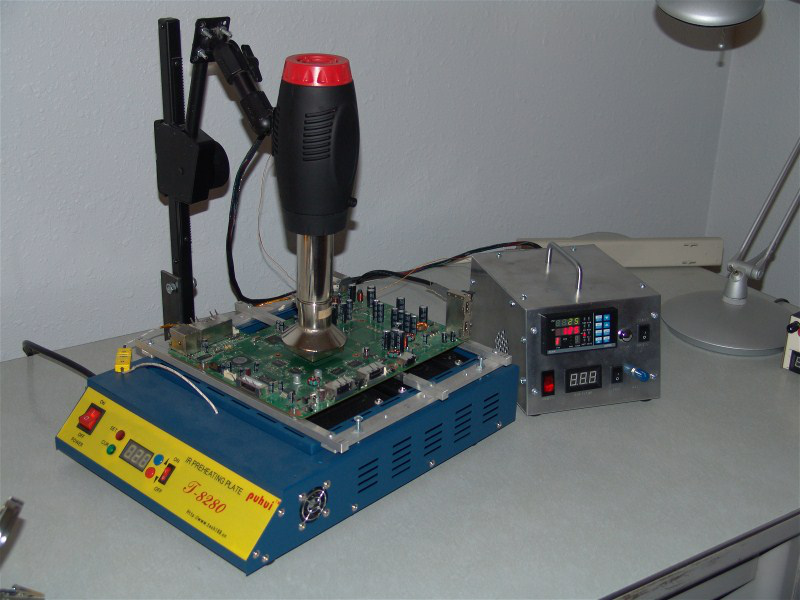
2.PCB Preheater—Setup Heat Gun
Keep a note when you distribute things to make it easy for you when reassembling them. For this situation, you are to understand how the switch and blower need to be wired.
The blower should be dismantled, then identify the control and wire connections.
This will help in the heat controller’s wiring and replacing a power cord of two wires with that of three wires.

3.PCB Preheater Gun (Naked)
You must be keen on this item. The plastic sections can be reused in welding ventures you might need to do later on. Utilize the heat gun’s lower side.
A red wire should be linked to switch through the terminal on the more downside. You can expel the dark wire from the high terminal side of the switch.
A ground wire is not brought together with a Heat gun. As a safety measure, the blower should be grounded.
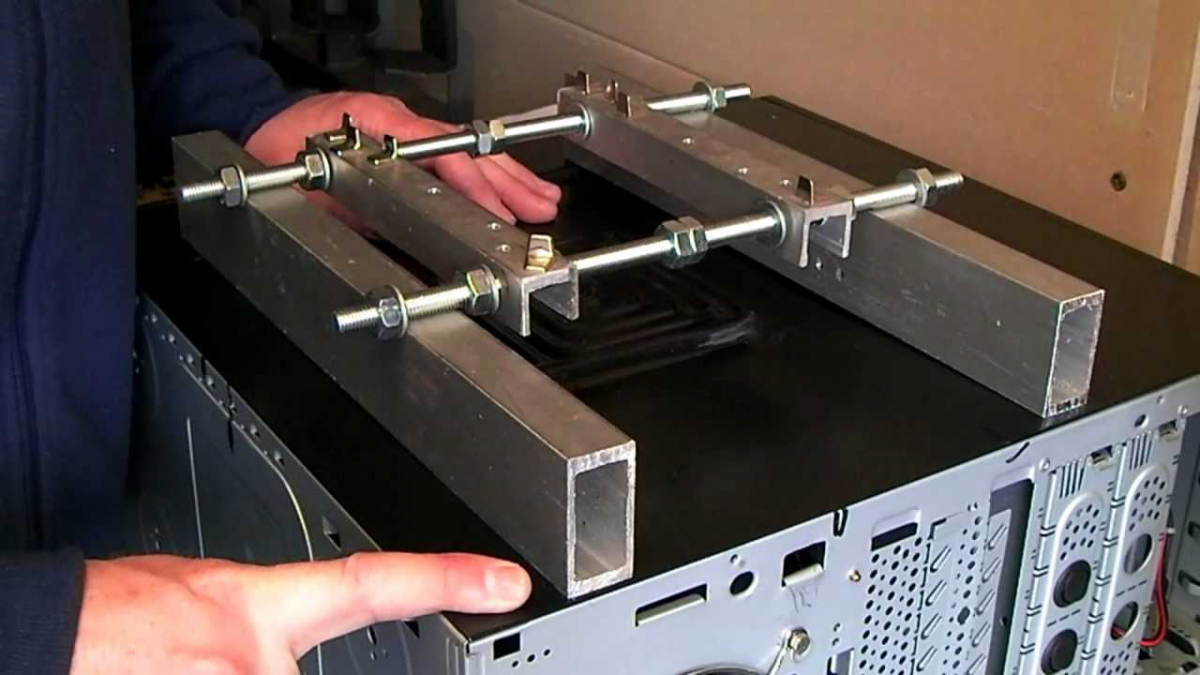
4.PCB Preheater—Mounting of Heat Blower
Utilize plywood of dimensions 6 inches by 12 inches by ½ inch bit of to develop the pre-heaters base. We require space for the fan and heat controller as well.
The strap should be bent to surround the heater blower to test the correct length that fits. The quarter-inch square tubing should be cut to enable the placement of the blower on the tubing.
Amass the fan to the board’s base.
5.PCB Preheater—Mounting the Blower
Make sure that the elbow of the copper pipe is placed on the heat gun from the end. Press the elbow to make it fit. Ensure that strapping nuts are not over-tightened.
6.The first part of Heat Controller Circuit
You can look up the internet to know about the circuit of heat controller or even refer to Rob Paisley’s simple circuit structure.
You must keep in mind that 1200 watts are the maximum Watt for this gadget. In situations where you exceed that, the PCB gets heated under a lot of heat.
However, this circuit board is simple and can easily handle eight amps of the current which your blower needs.
Conclusion
The other steps include heat controller circuit part 2, fan circuit part 1 and 2, build box cover, testing and clean up, using the preheat workstation.
These are explained on the web in a defined way. The steps mentioned above are the ones that need your core attention.
