Arduino Rotary encoder is useful in CNC machines, robotics, and even printers due to its solid build and fine digital control.
If you’re working on an Arduino rotary encoder project and need help, you’re in the right place.
Today’s article looks at the rotary encoder, its configuration, types, working, examples, and applications.
Contents
What is a Rotary Encoder?
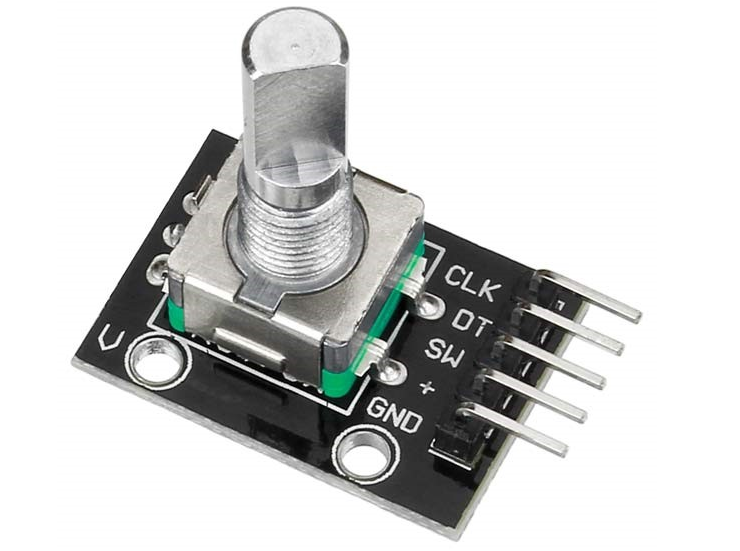
Fig 1: A Rotary Encoder
It’s an electro-mechanical position sensor that determines a shaft or axle’s angular position or motion.
It then converts the angular position data to digital or analog output signals.
Rotary Encoder Pinout
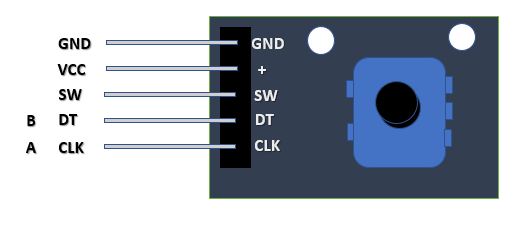
Fig 2: Rotary Encoder Pinout
- VCC- Supply voltage of 3.3 or 5V
- GND- Ground
- SW- Active low button
- CLK (Output A)- Output pulse to determine the rotation in either direction
- DT (Output B)- Lags CLK by 90 degrees and determines the rotational direction
Types of Rotary Encoder
Fig 3: A Gray Code Absolute Rotary Encoder With 13 Tracks
Source: Wikimedia
Absolute Encoder
Consists of a photodetector, a light source, a disk, and a signal conditioner. It retains position information when power is lost and resumes when it’s back.
Also, the relationship between the physical position of the controlled machinery and the encoder value is set at assembly. You don’t have to resume to a calibration point to retain position accuracy.
Incremental Encoder
Incremental encoders begin their count at zero when powered on and will immediately report position changes. However, it doesn’t keep its absolute position. You’ll have to move a monitoring system to a fixed reference point to start a position reading.
How does Rotary Encoder Works?
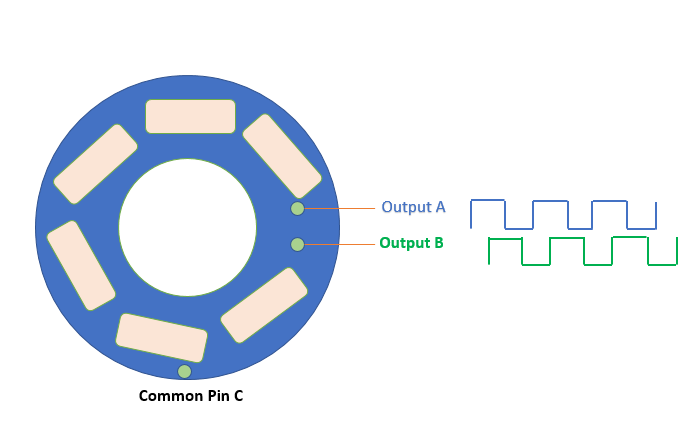
Fig 4: Working of a Rotary Encoder
It has two contact pins, A and B, and a common ground pin, C. When you turn the knobs A and B contact pin C in the order of rotation, they produce signals. Furthermore, the signs are 90 degrees out of phase with each other (quadrature encoding).
When you turn the knob clockwise, pin A connects first, followed by B. Also, the opposite happens when you turn the knob counterclockwise.
We can then track when the pins connect to and disconnect from the ground to determine the direction of rotation.

How to Choose Rotary Encoder?
Incremental or Absolute Encoder?
Choose one with a better cost to capacity ratio or one that returns to the origin or not during startup. Also, pick one depending on noise tolerance and top speed.
How much resolution is needed?
Choose one that matches the precision required and the cost of the equipment. Therefore, you should select one with a resolution of ½ to ¼ of the used machine’s precision.
Dimensions
Consider the type of rotary shaft to be used regarding the mounting space. For your information, the shafts can be hollow or regular.
Permitted Shaft Loading
When picking an encoder, consider how the mounting methods influence the shaft’s load and mechanical life.
Maximum Permissible Speed
Select one while considering its maximum mechanical speed during use.
Maximum Response Frequency
Select one based on the maximum speed of the device’s shaft when used together.
Maximum response frequency = (Revolutions (RPM)/60) * Resolution.
Ensure that you select one whose specifications give certain leeway regarding the maximum response frequency value.
Degree of Protection
Please choose a model depending on the dust, oil, and water present in its work environment.
- Dust only: IP50
- Water or oil present: IP52 (f), IP64 (f)
- Oil present: Select oil-proof ones
Startup Torque of Shaft
In this case, consider the startup torque.
Output Circuit Type
Here, consider the signal frequency, transmission distance, noise, and connection device.
Advantages & Disadvantages of Rotary Encoders
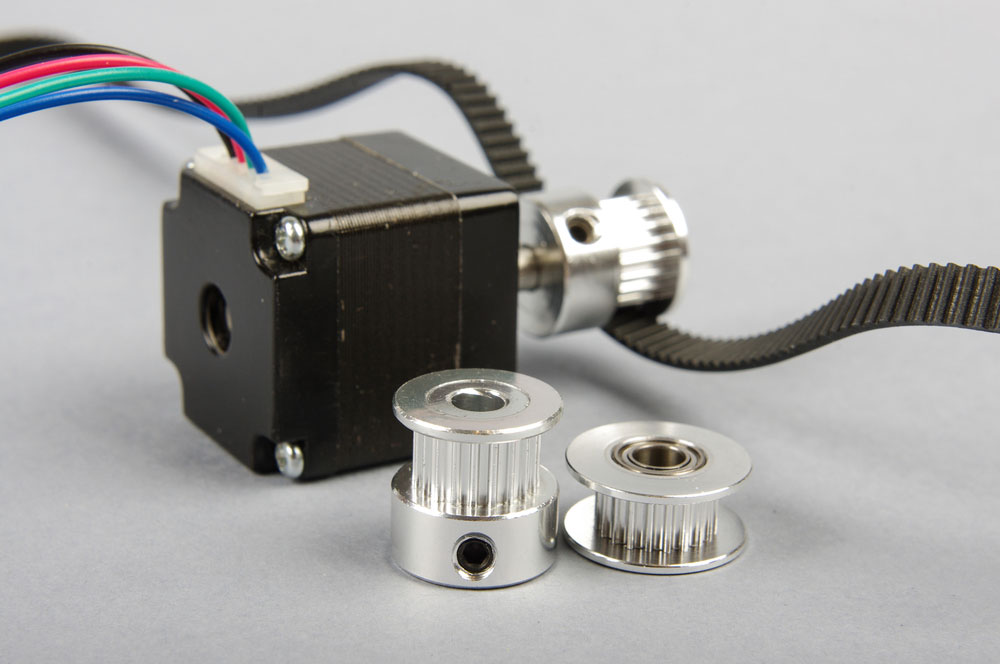
Fig 5: Stepper Motor and Timing Pulley Mechanical Part for 3D Printers and CNC Machines
Advantages
- High resolution
- Low-cost feedback
- High accuracy and reliability
- Compact
- Combines digital and optical technology
Disadvantages
- Radio and magnetic signals interfere with magnetic encoders
- Direct light interferes with optical encoders
- Affected by oil, dirt, and dust
Rotary Encoder Arduino Example
Basic Example
You’ll need an Arduino board, an LCD, a potentiometer, connecting wires, and a breadboard. Connect as shown below.
Connect the module’s +V pin to Arduino’s 5V pin and ground your setup. Next, connect the CLK and DT pins to digital pins 2 and 3, respectively.
Controlling a Stepper Motor Using a Rotary Encoder
You’ll need an Arduino board, a stepper motor and driver board, a rotary encoder, and a breadboard.
Connect the encoder GND to Arduino GND and the + to Arduino 5V pin. Additionally, connect DT to Arduino analog pin 5 and CLK to Arduino analog pin 4.
Control Servo Motor with Rotary Encoder
Rotary encoders are crucial in projects that need a precise position of objects, such as a robot’s arm.
To use, ground the Brown/Black wire of the servo motor. Also, connect the Red wire of the servo motor to a 5V source. Finally, the Orange/Yellow wire to PWM enabled pin 9.
Conclusion
As we’ve seen, you can use a rotary encoder with Arduino for many of your projects. They’re simple to use, versatile, and cheap to acquire. For assistance with your project, or if you have some gray areas that need clarification, please contact us.


