
Generally, the FreeNAS boot device is an open-source Network-Attached Storage (NAS) operating system based on FreeBSD. So far, it has helped several people convert their old computer systems to their personal cloud drive/NAS. During its set-up, you can try it on a Virtual machine before its installation to the main server or system. Additionally, you can install FreeNAS on a USB drive or a blank pen drive, as we’ll discuss today. But first, create a FreeNAS bootable USB drive.
Let’s start.

FreeBSD 13.0 bootloader
Source; Wikipedia
Contents
Download the FreeNAS OS Image
The first step involves downloading a FreeNAS OS image (in the form of a .iso file) into your USB drive. There are several FreeNAS in the market, but we’ve settled for FreeNAS 11.3 in this project.
Then, you can carry out the FreeNAS 11.3 installation in a separate SSD or HDD hard drive.
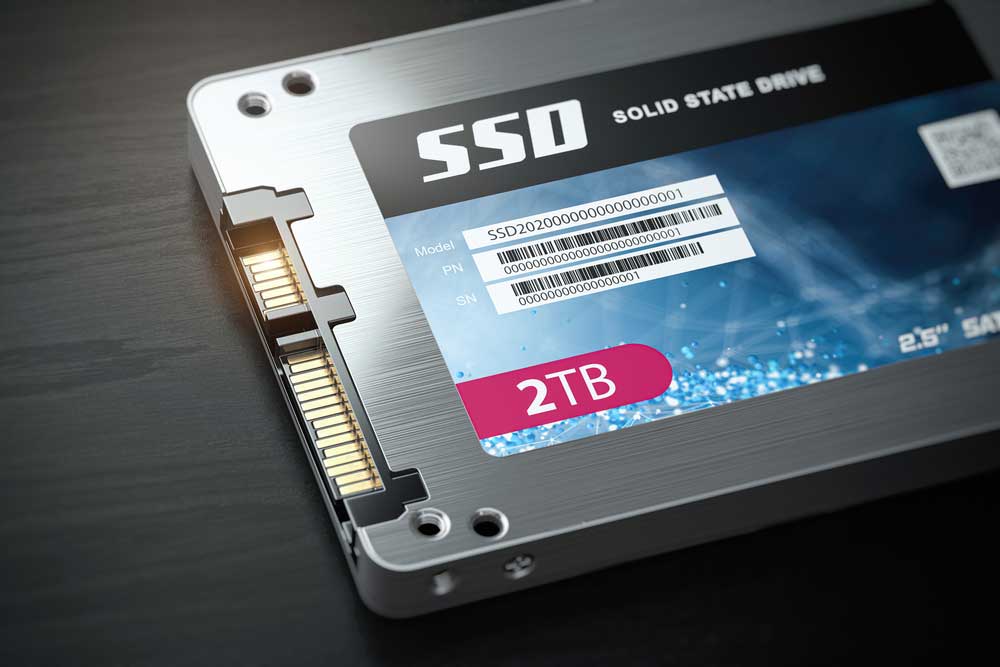
(SSD hard drive)
Creating a Bootable USB
The second process involves three steps as follows;
Step One
Start by preparing your bootable USB by formatting one USB drive. Further, if you’re using Windows, right-click the USB drive on your computer and select format to format the drive.
Also, remember that FAT32 is a good choice for your File System.
Step Two
Secondly, download an Open-Source Flash burner version (balenaEtcher) that matches your computer’s OS (Linus/macOS/Windows).
Step three
Finally, select your formatted USB drive and the downloaded FreeNAS OS image and flash to make your bootable USB fully functional.
Installing FreeNAS OS
It involves the steps below:
Step One: Enable the CSM Mode in ODYSSEY – X86J4105
First, plug in the keyboard, monitor, and bootable USB to ODYSSEY – X86J4105 and switch on the power. Continue pressing the DEL key till the set-up screen appears during the booting-up process.
Next, look up Advanced to CSM support options, then press Enter key to enable the setting.
Step Two: Installing the Operating System
You’ll reboot the ODYSSEY – X86J4105 and press the F7 key to get to the boot manager screen. From there, choose the installer/bootable drive and press Enter.
Don’t forget to choose a bootable flash drive with a FreeNAS OS image.
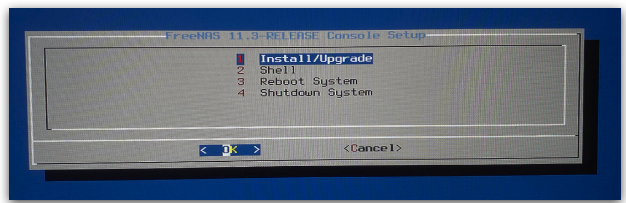
Step Three: Installation process
The boot screen below will appear. Next, choose the Bootable Installer key by pressing Enter.

Afterward, select Select/Install/Upgrade from the Options menu, then press Enter.
Here, you’ll see the two USB drives. So, use a Spacebar to select the correct USB drive for installing the FreeNAS image.

If the warning like the one below appears saying that it’ll erase everything in the chosen drive, press Yes.

Now, you’re free to create your root password that’ll later help you log into the FreeNAS while in the Web Interface. Once the installation process is over, it should appear like the picture below.


How to set up FreeNAS?
The guide below summarizes the steps you’ll follow in the initial installation process after running through the Wizard. If you can’t access the Web Interface address, kindly check the internet connection.
- Type in a pool name, then click next.
- Secondly, select a RAID set-up (you can leave it on ‘automatic’) and click Next.
- Choose the desired Directory Service (Active is ideal) and proceed with the Next option.
- Then, enter the share name, choose Windows (SMB), and select ownership.
- Type in a username and choose to Create User, where you’ll enter a new password.
- Form a new group by selecting Create Group, then display what you have by altering the permission boxes.
- Lastly, enter Return, Add, and Confirm.
N/B; If you click Next, you’ll be able to set up an email on the server when you need to configure the window.
Installation Troubleshooting
Sometimes, your system may fail to boot into FreeNAS, and you’ll need to rectify the situation. Under such circumstances, you can do the following;
- Begin by checking the system BIOS, and check if you can change the existing USB emulation to the hard drive from floppy/DVD/CD. However, if it doesn’t boot again, see if the drive/card complies with UDMA.
- Secondly, you can check if your system BIOS has an option of booting via a legacy BIOS mode if it doesn’t support EFI with BIOS emulation.
- Some technologists have discovered that some 4GB USB sticks from certain brands don’t function because their sizes aren’t 4GB. In this case, you can fix the problem by switching to an 8GB stick.
- Fourthly, ensure the image written to the compact flash card is MSDOS formatted.
- When you’re booting up your system, and it stops at a mountroot˃prompt, use the guidelines in Workaround/Semi-Fix for Mountroot Issues with 9.3.
- Then, when you repeatedly get the error message below when the system is hanging during boot up:

Open the systems BIOS and check for an onboard device configuration for the 1394 controller. After finding it, disable the onboard device and then reboot the system.
- Finally, if a Windows system burns an image and the image fails to boot, start by wiping the USB stick. Do this before a second burning attempt with a utility like Active@ KillDisk and a specific USB stick. It helps familiarize the Windows with the partition written from the image file.
Upgrading
An advantageous feature of FreeNAS® is providing a flexible procedure that keeps the OS up-to-date, starting from version 9.3.
You’ll also need to pay close attention to the following;
- You can use a graphical administrative interface or ISO to perform upgrades on major releases like the 9.3-to-10.0 version. However, some release notes on a new major release may be specific to an upgraded method, e.g., an ISO upgrade.
- Secondly, signed updates have replaced minor releases. In other words, you’ll not need to;
- Download upgrade installation files and their associated checksum manually for updates.
- Wait for newer versions of features or drivers before an update.
- Wait for minor releases with system updates to update the OS.
- Lastly, the updates are low-risk operations since the system updater automatically provides a boot environment. In this way, you can go back to the previous OS version by rebooting the system. Then, check on the boot menu and select the previous boot environment.
Warnings before an upgrade
- The system doesn’t support data residing on one UFS-formatted disk or a UFS RAID of disks.
- Unless you are 100% certain of not returning to the previous version, don’t upgrade the ZFS pool. You’ll receive alerts on newer feature flags even though the update system won’t automatically upgrade the ZFS pool. The safer option is leaving the pool in its current version.
- Moreover, the initial configuration may fail to identify an encrypted ZFS pool. Cancel the wizard if the initial configuration wizard begins,, and there’s a GELI-encrypted ZFS pool after an upgrade, then import the encrypted volume. The OS now recognizes the imported volume.
- The system doesn’t also support an upgrade on 32-bit hardware. You can upgrade the system if the hardware supports 64-bit and 32-bit versions of FreeNAS®. Unfortunately, you’ll lose archived reporting graphs when upgrading.
- The OS doesn’t support upgrades from FreeNAS® 0.7x since it lacks a way of importing configuration settings from the version.
Conclusion
That’s it for today, installing a FreeNAS on a USB device and having a personal NAS. It is a simple process with minimum requirements. If you have questions, you can contact us. We’ll be glad to help.