Are you looking for a way to keep track of time on your Arduino, including seconds, minutes, days, months, and even years? You need an RTC module, the DS1307 Arduino, in this case.
A real-time clock (RTC) is a device that can help you stay on track with time and even perform actions at specific times.
However, you’d need to Interface one with an Arduino for this to work on any circuit. Luckily, we’re here for you.
In this article, we’ll use the DS1307 as our RTC module, and you’ll learn everything about it and how to use them with Arduino boards.
Contents
What is the DS1307 Module?
Ardunio and most microcontrollers come with built-in timers that you can use to supply power to the board. But once you disconnect the power, it’ll reset all your timers. That’s where an RTC module comes in.
If you’re handling data logging, alarms, or clock applications, you’ll need an RTC for continuous operation. Also, you can use a microcontroller’s built-in timer for easier projects.
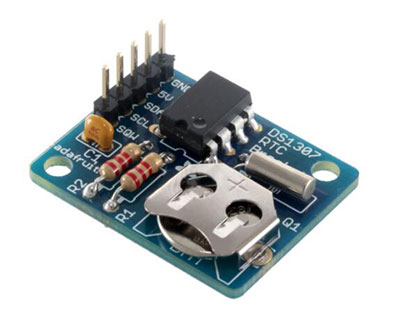
The DS1307 model is one popular RTC that works based on the DS1307 clock chip. It can show you the seconds, minutes, hours, days, months, and years of any project you record.
In truth, the DS1307 uses a lithium battery that keeps it independent of the Arduino’s power supply.
For this reason, it continues keeping track of the time even if you’re reprogramming your Arduino or disconnecting it from power.
Interestingly, the DS1307 is also cost-effective and energy-efficient. Also, it’s capable of running for long periods before needing to replace batteries.
DS1307 Pinout

DS1307 RTC Module with Arduino
Now, let’s look at how to use a DS1307 with an Arduino.
Circuit Diagram
Check out the circuit diagram for this project below:

Circuit Diagram
Components Needed
Here are the components you need:
- Arduino Uno board
- DS1307 RTC model
- USB cable for uploading
- Breadboard
- Jumper wires
- Base Shield V2 (optional)
How to Build
Step 1: Connect your Hardware
First, connect your RTC to the I2C port of the base shield. It is not compulsory, but it will make your connections easier. So, if you don’t have a base shield, you can connect your RTC directly to your Arduino board. You can do this by connecting the pins of the RTC and Arduino in the following way:
- VCC (RTC) to 5V (Arduino)
- GND to GND
- SDA to SDA
- SCL to SCL
Next, plug the RTC into your Arduino board; if you’re using a base shield. Afterward, use your USB cable to connect your Arduino to your computer. Indeed, if you want to enjoy maximum performance, add a 3-volt CR1225 lithium cell battery to your RTC. However, remember that using your Arduino’s primary power to run your RTC may decrease performance and stop the crystal from oscillating.
Step 2: Set up your Software
In this next crucial step, download the RTC library and install it on your Arduino IDE. Then, you can create a new Arduino sketch and input the following codes:
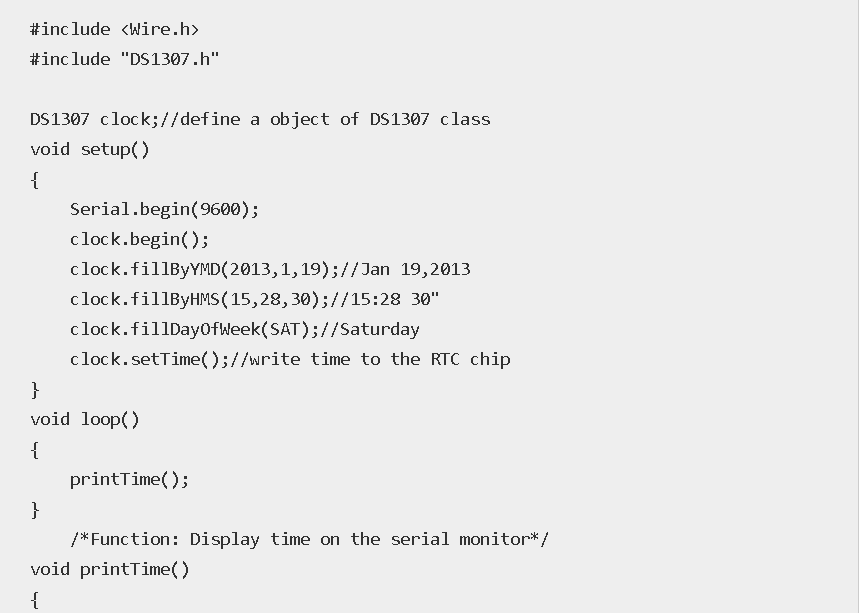
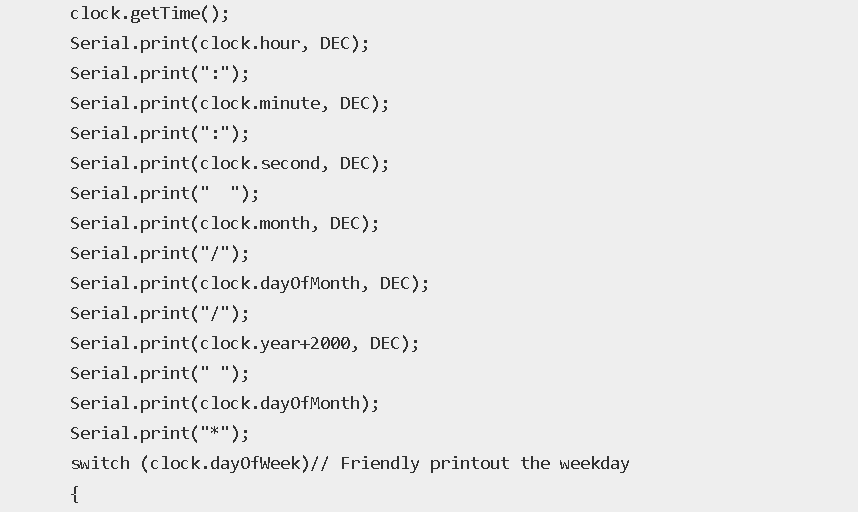
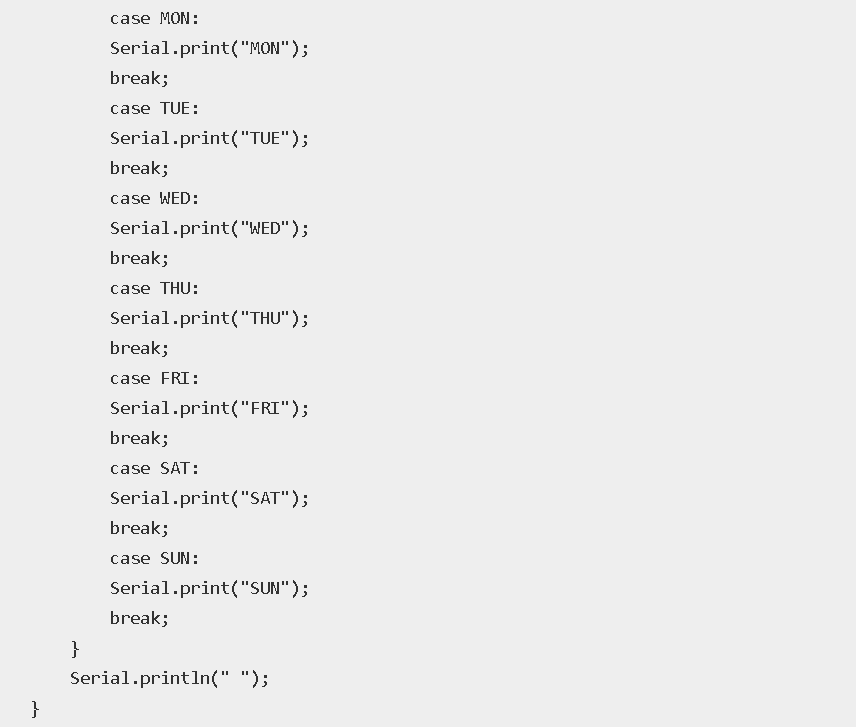
Arduino Code.
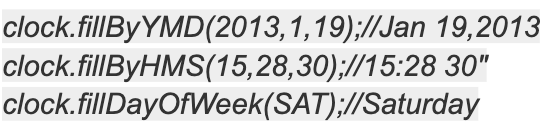
You can change function arguments to set the current date/time. However, be sure to focus on the format of these arguments. It should look like this:
Next, you can upload your code and open your serial monitor to collect data from your sensor.

DS3231 vs DS1307: Which is Better?
Le’s face it. What sets the two RTCs apart is the time-keeping accuracy.
The DS3231 offers higher precision than DS1307. But that’s not all. The DS1307 provides optimal performance, making its external temperature affect the oscillator circuit’s frequency, which also handles the internal counter.
While this sounds like a problem, it helps to keep the clock only off by some minutes every month. On the other hand, the DS3231 offers more accuracy as no external factors affect its internal oscillator.
While both modules have a small EEPROM and the ability to generate square waves with different frequencies, the DS3231 has an alarm function that makes it even better than the DS1307. However, it doesn’t mean the DS1307 is bad. It’s still a board with great value and will work well for your applications. Also, the DS1307 is more affordable and beginner-friendly than the DS3231.
RTC Arduino Project Ideas
Are you interested in making RTC Arduino projects? Here are some great ideas to start with.
RTC OLED Clock
RTC modules allow you to make an OLED digital clock for your home. When you pair it with your Arduino, it will show the time, day, and date.
Here’s what you need for this project.
- Arduino Nano v3
- Grove-RTC
- Grove-Button (2)
- 3v coin cell battery
- 32.768KHz crystal oscillator
- Grove-OLED display 1.12” V2
- 10k ohm resistor (2)
- Arduino Uno Rev3
You can get the complete resources and tutorial for this project here.
RTC Arduino Real-Time Garden Watering System
Do you want to prevent your plant from dying because you always forgot to water them? If your answer is yes, you can build this automated plant watering system with an RTC and Arduino. Interestingly, it will water your plants automatically at intervals.
Here’s what you need for this project.
- 20-liter water canister.
- Water level switch.
- Nano terminal adapter.
- Arduino Nano v3.
- Grove-buzzer.
- RTC.
- 12v power pack.
- Grove-relay.
- Arduino IDE software.
- Weatherproof electric box.
- 12v DC water pump.
Do you want to build this project? You can get the resources and full tutorial here.
Compact Alarm with Card Reader using RTC Module
Do you want to upgrade your home security or get alerts whenever someone steps into your home? Then, you can build this DIY compact alarm system with a card reader using the RTC module.
Also, you can turn this alarm on and off with a card reader. Alternatively, you can activate or deactivate it automatically with the RTC.
Here are the components you need for this project.
- Generic LED
- RC522 card reader
- Arduino Uno Rev3
- Grove-buzzer
- Resistor (221 Ohm)
- RTC
- Breadboard
- Grove-ultrasonic distance sensor
Click here to get the full tutorial and resources for this project.
Rounding Up
Interfacing your DS1307 with Arduino opens up multiple project possibilities. Hence, you can create automated projects and even a full display digital clock. You can also use the RTC module to remember the date and time.
In closing, using RTC without a battery delivers lower performance than anticipated. If you want the best performance from the DS1307, consider adding a battery to the battery slot.
Do you have any questions? Feel free to reach out to us, and we’ll be happy to help answer your questions.


