Do you love building radio projects? What if we told you that you could do your project with a Raspberry Pi-like board? Yes, we’re talking about the Kiwi SDR.
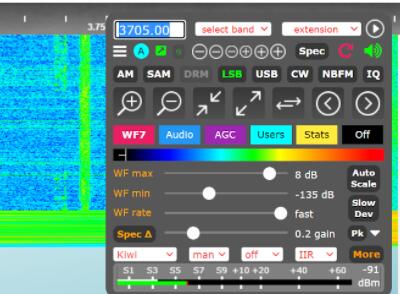
Indeed, the KiwiSDR is pretty different from other SDRs. For example, the device allows you to zoom in and out of various bands and find different stations.
No idea about how the Kiwi SDR works? This article will expose you to the secrets of this circuit board and the fun things it can do.
Let’s get started!
What is a Kiwi SDR?
The KiwiSDR circuit board is a Linux-based custom radio that allows you to connect to your local radio network. In truth, you can click the KiwiSDR to the BeagleBone Black or BeagleBone Green embedded computer.
These BeagleBone computers are Linux development boards that are pretty similar to the Raspberry Pi. Interestingly, the KiwiSDR can receive frequencies from DC up to 30MHz. Also, it has different modes, including SSB, Synchronous AM, the popular FM, and AM.
Further, KiwiSDR offers various extensions that allow your radio project to receive different digital modes. Some of these modes are RTTY, CW, and WSPR. Additionally, it can view SSTV and Fax transmissions.
KiwiSDR can also connect to the internet. An internet connection allows you to tune in to the public KiwiSDR from any location. Plus, you can have four independent links on one radio.
In addition, KiwiSDR supports different browsers like Firefox, Safari, Chrome, and Opera. These browsers can be on Windows, Mac, or Linux operating systems.
While mobile device support for KiwiSDR is currently underway, you can use the browser interface on a device with a large display.
Also, you can visit over three hundred Kiwis here. And they are all available to the public.
Further, there are two KiwiSDR versions, including the cape alone and a complete version. The cape alone comes with only the board, while the full version includes a BBG enclosure and GPS antenna.
Kiwi SDR: How to Set Up KiwiSDR?
It’s pretty easy to set up a KiwiSDR. But, first, you must make connections and plug some devices into the board. So, follow the steps below to learn how to set up your KiwiSDR fully.
Step 1: Connect Your Ethernet Cables
First, grab your Ethernet cable and plug it into your network router/switch. Then, get the other end of the line and plug it into Kiwi’s Ethernet port.
Kiwi SDR: Step 2: Connect Your GPS Antenna
The Kiwi package should come packed with a GPS antenna. If you get the cape alone version, you’d have to get one yourself.
Once your GPS antenna is ready, look for the port-marked GPS with the 3.3-volt bias. Then, plug it in and screw it tight–so it doesn’t fall off. While at it, ensure you place the GPS antenna in a position that points towards the sky.
Kiwi SDR: Step 3: Plug-In Your HF Antenna
Next, plug your HF antenna into the second SMA port (next to the GPS antenna port). Don’t forget to screw it tight after connecting.
Kiwi SDR: Step 4: Power Up Your Kiwi
Lastly, plug inur power supply cable to intone Kiwi’s DC port. You should notice some light come on, indicating that the Kiwi is operational. Also, the Ethernet port will show some signs of activity, and the BeagleBone should work.
If your Kiwi doesn’t start up, check your connections. If everything looks good, it may be a hardware problem. So, you might have to replace your components or the board.
Kiwi SDR:Step 5: Update
The first thing you need to do after starting your Kiwi for the first time is an update. First, ensure you connect your Kiwi to the internet and let the updates begin.
However, it’s important to note that you may need some patience as the updates can take up to an hour. Alternatively, you can control different parts of the update by visiting the “Update tab.”
Moreover, your Kiwi will always be up-to-date if you have a network connection. Why? Because the Kiwi board continuously checks for any updates whenever it boots.
Kiwi SDR:Network Configuration
Network configuration is the tricky part. In some cases, you might not need to configure your network. But there are two cases where you might need some network configurations:
- When connecting your Kiwi to a local network without public access through an internet connection without success.
- Or you are trying to make your Kiwi available to the public.
You can try connecting to the Kiwi for local use only with the following addresses: http://my.kiwisdr.com/ or http://kiwisdr.local:8073/. If that doesn’t work, specify your Kiwi’s IP address manually.
Why? Because the local network you’re connecting to may have a DHCP server running. As a result, your Kiwi will have an automatic IP address from the server.
The kiwi. A local hostname may work most of the time. But not all systems recognize the hostname. Hence, the need to specify the IP address manually.
Moreover, you can find your Kiwi’s IP address by visiting my.kiwisdr.com. Then, check the LEDs on the Beagle. Or confirm the list of IP addresses assigned by your routers’ DHCP server.
If you want public access, open your router’s port, 8073. Consequently, it will accept incoming connections. Also, you can tweak the settings if you want people to access your Kiwi through an IP address or domain name.

Kiwi SDR:Applications
Here are some of the things you can do with a KiwiSDR:
- Set up remote receivers in locations without too much noise.
- Listen to different stations and channels.
- A KiwiSDR can access a remote Kiwi and give propagation reports to those TXing with hams.
Last Words
KiwiSDR is a special SDR because you can connect it to your local network. In addition, it’s not restricted to one computer. Instead, it’s available on all computers and devices connected to that network.
The BeagleBone will handle the computing, while you’ll only see the waterfall stream and compressed audio.
What do you think about the KiwiSDR? Do you plan on getting one? Please feel free to reach us.


