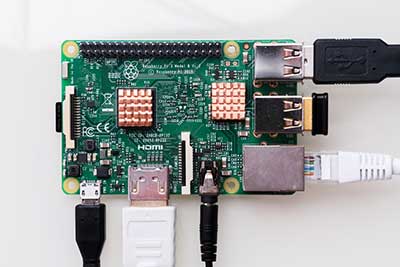
The Raspberry Pi is one of the most popular microprocessors primarily due to its versatility. In this article, we’ll elaborate on how best to access the Raspberry Pi on a web interface via the OMV Raspberry Pi. Also, we’ll explore the installation process install this software.
Contents
Why do you need OpenMediaVault?
If you’re using the Raspberry Pi OS, installing an OpenMediaVault (OMV) is imperative for the following reasons.
- The software will grant you access to a web interface to aid in managing a storage device and file sharing. Also, it converts the Pi to a Network configuration Server.
- Moreover, the file server will work even on Raspberry Pi’s inferior versions, such as Raspberry Pi OS Lite.
- In terms of functionality, this software operates like Samba. Therefore, it installs systems of a file server and offers an interface between the file system user and the respective configuration file. But the OpenMediaVault (OMV) is an ever better interface than Samba as it is more user-friendly.
- Lastly, it is a networked attached storage (NAS) system. Hence, it enables the conversion of the Raspberry Pi to a robust NAS, thus aiding access rights management to extensive functions.

How to install OpenMediaVault to a Raspberry Pi?
Check out our extensive step guide/installation script for the OpenMediaVault on Raspberry. Our guide is generic but best suits users on the Raspberry Pi OS lite system. Therefore, it’ll still function on any Debian OS.
Also, note that the OMV is best suited to terminal-based systems. Hence, it may not function optimally on a desktop environment variant of your OS.
How to download and install OMV Step Guide
- First, update the already existing packages in your Pi by running the command below.

- Next, download the OpenMediaVault installation script via the command below.

- Remember, verifying the script’s contents from the application developers’ page is imperative. Also, note that the installation process can be lengthy as it must install image files and share settings, among others.
- Lastly, restart your Raspberry Pi via the command below after completing the previous step. Now it is ready for use as a network interface.

Loading the OMV Network Interface for the first time
Here’s how to use the OpenMediaVault software as an admin panel on the Raspberry Pi.
- First, accessing the OpenMediaVault Web GUI requires access to the Pi’s IP address. Therefore, check out the IP address via running the command below.

- Once done with the previous step, visit the address below on a web browser.

- Next, log in. by inputting ‘admin’ as the default username and ‘open media vault as the password.
- The previous step will grant you access to a dashboard like the one below.

- Therefore, you now have default permissions from the panel to control the OpenMediaVault.
Changing the OMV Password
- Changing the password is important in preventing access by non-authenticated users. Therefore, on the left-hand menu, select “General Settings.”
- Next, choose the “Web Administrator Password” button, as shown in the picture below.

- The system will prompt you to enter a password. Once done, click “Save.”
A shared folder will be on your drive; you can access it via file sharing protocols. Check out the step guide for this process.
How to add a new File System
The shared folder requires a file system to act as the shared folder’s hosting space.
- First, connect a USB drive of considerable storage capacity to the Raspberry Pi OS Buster for this process.
- Next, select ‘File Systems’ from the storage menu.

- You will then gain access to a table with various file systems. Choose the one you need and click “Mount.”
How to Create the Shared Folder
- First, select the Shared folders settings and click “Add.” It will open a dialogue box from which you can add a shared folder.
- Then, fill out the resulting form correctly. Note that this is the information for the shared folder you created.
How to Enable the SAMBA/CIFS within the OMV
- Select “Services” on the sidebar and click the “SMB/CIFS“ button.
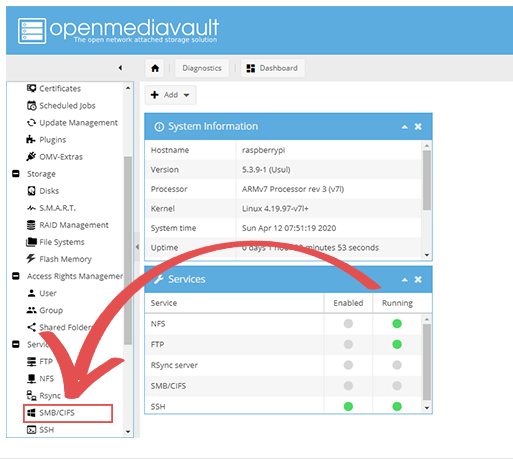
- Then, switch on the “Enable” button to grant access to the SMB/CIFS in the Raspberry Pi and click “Save.”
- Next, click “Add Share” from the shares tab at the top.
Adding New Users in OpenMediaVault
- Lastly, on the sidebar, select “Access Rights Management.”

- Next, click “Add,” and a prompt will pop up. Input the necessary details of the new user and save once done.
Conclusion
An OpenMediaVault software improves file management on Raspberry Pi, as we have explained. Therefore, you’re now good to go from our comprehensive installation script. But if you have any queries, reach out, and we’ll respond immediately.


