Contents
What is a 7-segment display?

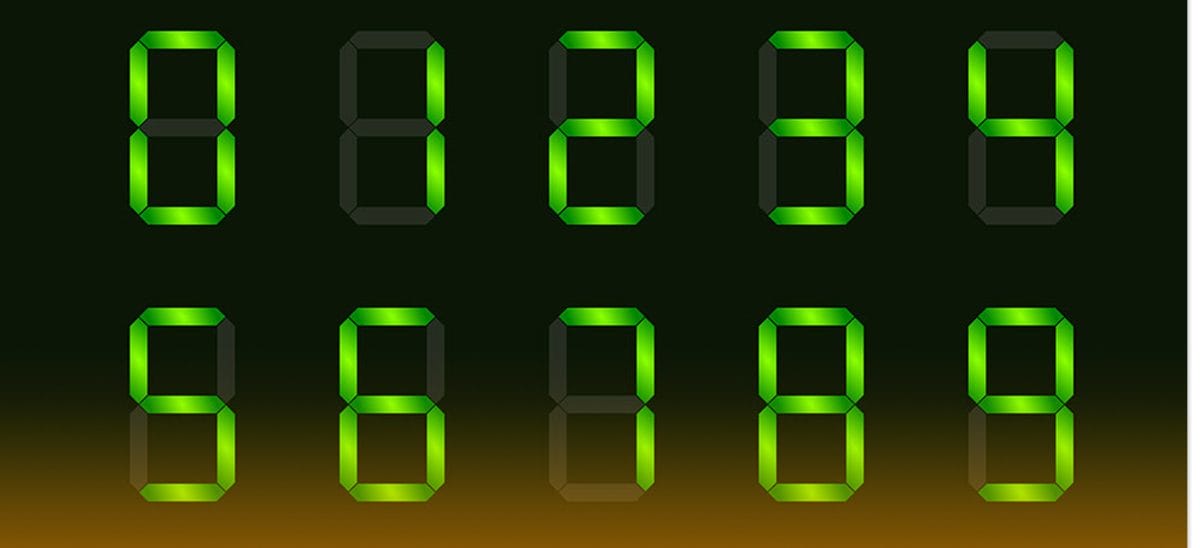
Fig 1: A numerals 7-segment display
Seven-segment displays feature 8 LED segments. Each segment represents an LED and is useful for forming digit displays and alphabet representations. The segments are as follows: a,b,c,d,e,f,g, DP.
One end of the individual LED pins is pulled out while the others combine to form a common. Therefore, to light one LED segment, we need to connect a power supply to the common pin and the segment’s pin.
It enables us to power one segment at a time to form numbers from 0 to 9. It also enables us to form some alphabets. Furthermore, we can also represent decimal digits thanks to the DP(decimal point) segment.
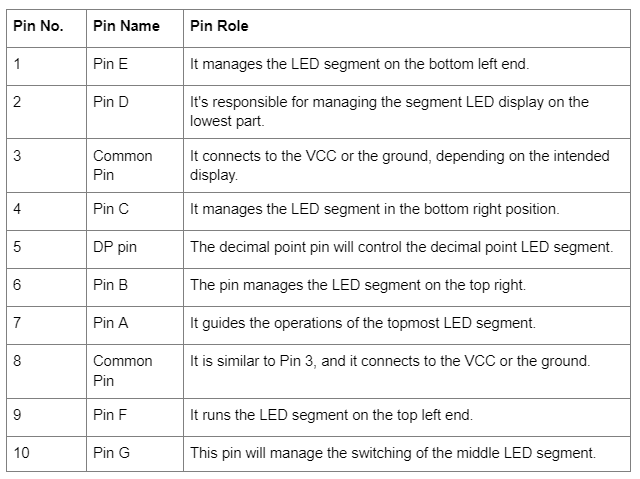
7 Segment Display Pinout Configuration

Fig 2: A 7-segment display pins
Types of 7-Segment Displays

Fig 3: A Red Numerical 7-segment display
Note that you can choose different colors and sizes for segment displays. However, the 14.20mm red 7-segment display is the most prevalent module.
Other types of display are common, but the red color display is the most typical. It consumes relatively lesser current than other LED 7-segment displays.
As for types of segments displayed, the two main kinds include the following:
A common cathode 7-segment display

Fig 4: 7-Segment Display Common Cathode
In common cathode displays (CC), the common terminal will connect to all eight common cathode-led display pins. Thus, common cathode types require you to connect the common pin to the ground pin. At the same time, power the other pins via a +5V power supply.
Common anode displays
The common ground pin connects to the 8 LED individual anode terminals for CA display. Therefore, for effective anode connections, connect the common pin to a +5V power supply and ground the segment you want to switch on.
Note that in all applications, you cannot use a common cathode display for the common anode display and vice versa.
How to use 7 Segment Displays?

Fig 5: Seven-segment displays common cathode vector
The cardinal advantage of this display is that it’s easy to use and can operate even without a microprocessor or microcontroller. All you need is a 7-segment counter IC, such as the IC CD4026, which is useful for simple circuit projects.
But, in most cases, electronic devices use the seven-segment display together with an MCU or MPU. The eight individual segment pins will connect to the microcontroller’s I/O pins. At the same time, the common pin will connect to the ground or Vcc, depending on the type of display.
Also, toggling the GPIO pins in a select sequence will deliver the desired number, as shown in the table below:
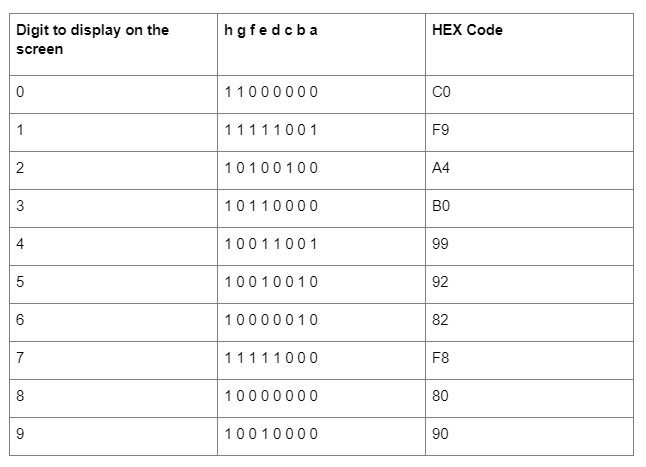
Note: From the table above, say we want to display ‘0’ on the screen. We’ll turn on all LED-based 7-segment displays apart from the line “g” individual segment. Thus, the bit pattern will be ‘11000000’, as highlighted in the table.
Also, note that the above table is for the common anode 7-segment display. For the CC type, we’ll have to replace ‘0’s with ‘1’s and vice versa.
7 Segment Displays Interfacing with Arduino

Fig 6: 7-segment Arduino indicators attached to a breadboard.
You can interface a common anode seven-segment display with an Arduino UNO board. The components you’ll need for the application are as follows:
- Breadboard
- Connecting wires
- Seven 220Ω resistors
- Arduino Uno
- Power Supply.
Make the connections as follows.
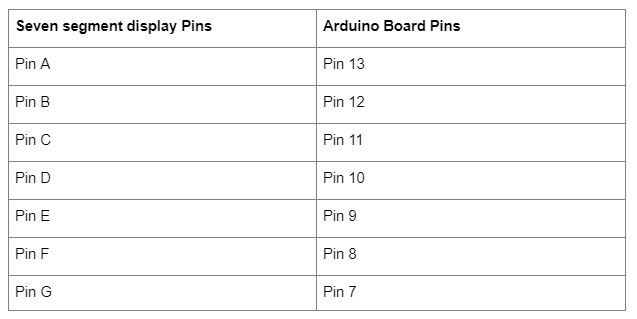
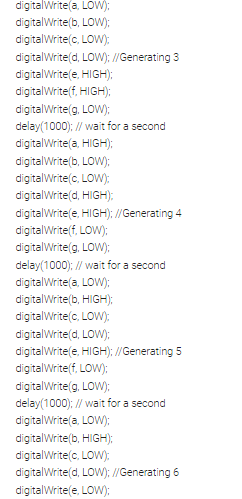
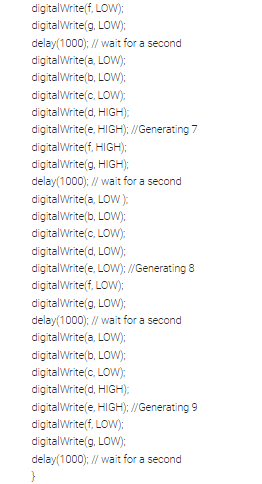
Since this is a common anode type, the common pin connects to the Arduino board Pin 9, and the logic is HIGH. For the common cathode type, you’ll have to reverse the logic. Finally, the Arduino code is as follows:

Applications

Fig 7: A 7-segment LED display board
- Firstly, the module is essential in applications involving the enlargement of individual digits fonts.
- Moreover, essential in four-segment combinations to showcase sensor values in up to four numerical digits.
- Thirdly, they are essential in display applications with low light, thanks to their bright illumination.
Conclusion
7-segment display pins are easy to use in simple college and DIY projects. For additional information on this module, we are ready to communicate with you immediately after you engage us.