DC motor controller is almost everywhere, and we see them in nearly all applications. DC motor controllers find substantial use in everyday life, from locomotives to drills, from lathe machines to RC cars. There are hundreds of manufacturing firms out there engaged in manufacturing DC motor controllers and making huge profits. But are you aware that you can make yourself a
DC motor controller and save some cash for other needs?
Are you feeling helpful and interested in creating a piece of your own? While WellPCB can provide you with motor controllers to fit your project, we also offer a DIY guide for the handy ones. We hope you’ll enjoy this instructable that consists of the steps you need to follow. Continue reading.
Contents
- 1 Tools and Components/Materials
- 2 DC Motor Controller–Assembling the Pieces
- 3 DC Motor Controller–Soldering the Components
- 4 DC Motor Controller–Cutting Out the Circuit
- 5 DC Motor Controller–Begin the Tidying Process
- 6 DC Motor Controller–Put your DC Motor Controller into Use
- 7 DC Motor Controller– Why Choose WellPCB?
- 8 Conclusion
Tools and Components/Materials
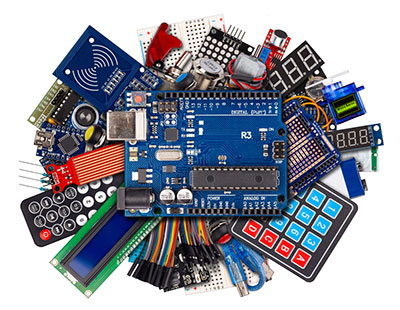
Before beginning your journey towards making your own DC motor controller, you’ll first need some tools and materials in place. Without all the tools and materials, there are chances that you’ll encounter a frustrating and unpleasant experience. Much worse, you may end up giving up way early before you complete your project. Some important materials that you need include:
Thin Wire – a 24 gauge core wire is the best
Perfboard – you may use any that you like or posses
2x Power MOSFETS – preferably, you may use the IRF510 through any other
equivalent such as the NTE2382 can do the work
Pin Strip – find one that you can easily snap off a few increments from
2x Rectifier Diodes
DPDT 30V Relay
After you have assembled all the materials that you need in one place, it’s now time to find the tools or handy equipment necessary. Remember that having or using incompetent tools may complement your task, and choosing the right tools is essential. Some of the tools that you will need include the following:
Hot Glue Gun and Hot Glue
A Solder and a Soldering Iron
DREMEL – you may use any tool you prefer for cutting the perfboard
Wire cutters/strippers – ensure that they are also applicable or play the same function as pliers
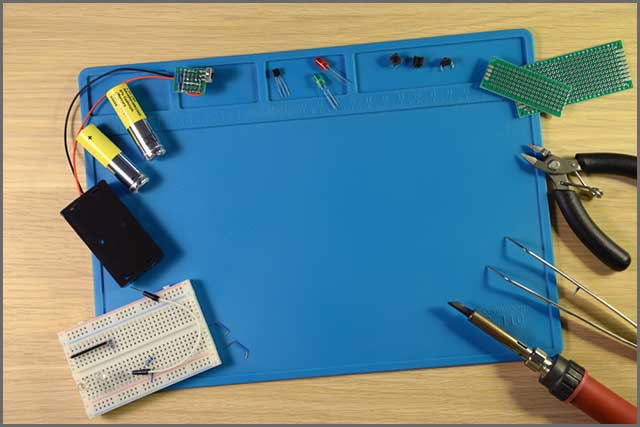
DC Motor Controller–Assembling the Pieces
After the completion of your first step towards having your DC motor controller, step 2 follows. The good thing is that the tools and materials needed for the project can be found with ease. Now, put all the devices that you have assembled onto your surfboard. Would you please put them in a manner that will be easy to solder the circuits while still fitting perfectly onto your board?
For pins, disconnect four-pin increments and two-pin increments. However, you do not need to assume the pin increments if you plan to mount the motor directly on the circuit by soldering. With ease, cut the two-pin increase to become a little bit smaller at both ends. After that, use your wire strippers to bend the most extended period of the four-pin expansion to a 90-degree angle.
In case you notice that the wire strippers do not require this function, you can go ahead and use extra sets of pliers that you may have. If you complete this step, now it’s time to move to step 3.
DC Motor Controller–Soldering the Components
Once you place the components onto the perf board, now it’s time to solder them. Carefully solder the circuit onto a schematic diagram. At this stage, you have the freedom of using any solder and soldering iron of your preference.
With the wire strippers, you have to cut and subsequently strip both ends of the jumper wire while soldering distant leads together. Surfboards with copper produce excellent results since it ensures compact soldering. At this step, too, you can solder the motor directly to the board or use a two-pin increment if you wish.
DC Motor Controller–Cutting Out the Circuit
You are almost close to having your DC motor controller circuit ready. After completing the third step, the next undertaking you have to carry out is cutting out the course. Here, you may cut it out to an appropriate size or based on its intended use. Remember that you have to keep your session functional.
Another critical thing at this step is to make sure that you cut your surfboard from the bottom. Cutting its base ensures that you cut below the power pins and the control. Ideally, you can opt for the DREMEL or use any other little saw to do the cutting. While the DREMEL is one of the best tools to use, you may find other competent tools that can equally do the job well. Finally, make sure the power pins and controller are easy to plug into the circuit or breadboard.

DC Motor Controller–Begin the Tidying Process
You are very close now. It’s time to make sure everything shines and is perfectly organized. Go ahead and clip all protruding wires that might be sticking out. You can use the wire strippers to dismember the protruding wires. Also, you can use a pair of pliers to bend protruding wires a couple of times until they break. However, make sure that you don’t damage solder points by using these methods.
After you complete cutting the protruding wires, set your hot glue gun ablaze. It is critical to ensure that there’s no incident of a short circuit occurring, and so erratically use your glue gun. By resorting to an unpredictable fashion, there won’t be an incident of a short course while your circuit gets protected and insulated at the same time.
DC Motor Controller–Put your DC Motor Controller into Use
Now you are done, and it’s time to put your DC motor controller into use! If you have followed all the steps above correctly, then your DC motor controller should work perfectly. Plug up the DC motor to the motor pins found on the motor controller. Then onto the breadboard, insert the motor controller gently.
With two colored wires of your choice, join the Vin to the micro-controllers Vin pin. Also, carefully select the corresponding GND to its GND pin and connect them.
Again, with two more wires of different colors, connect reverse and speed to any two digital pins that you prefer. Are you done? If so, now program away.
Tips: Safety Precautions
When attempting to make your DC motor controller, your safety is paramount. You do not want to encounter electrical shocks or other dangers that could be life-threatening. Always ensure that your safety matters by taking the following precautionary steps:
At no point should you mix up the pins
Don’t surpass 30 volts at Vin.
When working using a lot of power, ensure that the heat sink is attached to the
MOSFETs
• Use only DC wire motors
• If you want to go over 15 volts, make sure that you connect the GND and Vin directly to the power source
DC Motor Controller– Why Choose WellPCB?
Are you finding the above DC motor controller DIY steps somewhat painstaking to you? If you are in this bracket, don’t worry, as we are here to help you with your DC motor controller needs. We are a go-to DC motor controller firm serving hundreds of clients and industries. We not only satisfy client demands but do our best to exceed their expectations.
Being the most professional DC motor controller manufacturer, we have managed to receive international standards certifications. We offer DC motor controllers that consist of high-efficiency performance. Our products find use in many sectors and industries such as food production, automation machine, and anywhere where motion is required.
From idea generation, designing, manufacturing to sales, flexible manufacturing lines to accommodate small and large orders. We react quickly to client needs and are the right partner in providing efficient and reliable DC motor controllers.
Conclusion
DC motor controllers find their use in almost all electrical devices. DC motor controllers have got different complexity and features depending on the task that they intended. There are a host of companies –WellPCB included – currently engaged in manufacturing these devices.
But out there, there are hobbyists, students, and plenty of curious persons who intend to make their own DC motor controllers out there. As discussed above, making DC motor controllers on your own is not a tasking exercise as such. All you have to do is to follow the instructions carefully while adhering to safety precautions. But if you find the steps above overwhelming, you can always resort to WellPCB for all your DC motor controller needs. Regardless of your project or any other DC motor controller solutions, trust WellPCB to deliver.


