A keyer is a piece of equipment allowing signaling by hand via pressing single or more switches. For example, we have a keyer in a telegraph key form that functions in keying Morse codes. In today’s article, we’ll elaborate on a type of keyer known as the k3ng keyer. We’ll show you its features, schematic, and a project you can accomplish while using the device.
Contents
k3ng Keyer Introduce
k3ng is a relatively cheaper open-source keyer that’s Arduino-based Morse Code/CW with excellent flexibility and several features. Furthermore, you can use it with an AVR MCU chip/full-blown Arduino board, whereby you’ll program and use it directly in circuits.
Often, it’s ideal when permanently installing it inside a rig, e.g., a homebrew QRP rig or as a standalone keyer. Moreover, since it’s an open-source code, it is easily customizable as per one’s requirement.
The Main Features
The main features of the k3ng Keyer are as follows;
- First, its web interface exists but is under development, and it has a ‘Messy’/QLF straight key emulation.
- Then, it has an alphabet sending practice, USB mouse support, and a sleep mode feature.
- Thirdly, there’s a rotary encoder speed control, and CW receives the decoder.
- It also has non-English character support.
- Its modular code design allows you to select features and have an easy code modification.
- Additionally, it has a command mode that enables the paddle to program memories, change settings, etc.
- It has a logging and contest program interfacing through 2.0 interface protocol emulation and K1EL Winkey 1.0.
- Further, you can operate k3ng with a CW keyboard without using a computer since it has a PS2/USB keyboard interface.
- Again, it has an optional LCD (classic I2C displays and 4-bit LCDs supported). Then, it also has optional PTT outputs with configurable hang times, tail, and head.
- Finally, it has a low output/sidetone high/sidetone disable functioning to the key outboard audio oscillator.
Other crucial features are:
- American morse mode,
- Various practice modes and training modules,
- TX/RX sequencer,
- Mill mode,
- Keypad support,
- Non-volatile storage of most settings,
- Custom and pre-configured Prosigns,
- Workspace adjustment,
- Aerospace,
- ‘Dead operator watchdog,’
- Memory stacking,
- Weighting,
- Dah to Dit ratio adjustment,
- Keying compensation,
- Adjustable frequency sidetone,
- Farnsworth timing,
- Hellschreiber mode (beacon, memory macro, keyboard sending),
- Paddle reverse,
- CMOS super keyer Iambic B timing,
- Bug mode,
- Ultimate mode,
- Single paddle,
- Straight key support,
- Iambic A and B,
- Beacon/Fox mode,
- HSCW and QRSS,
- An optional speed potentiometer (commands can also adjust speed),
- Serial number,
- Up to 12 memories with macros,
- Command-line interface,
- Programming and interfacing via USB port,
- Up to six selectable transmitter keying lines, and
- CW speed is adjustable from 1-to-999 WPM.
Circuit Diagrams and Schematics
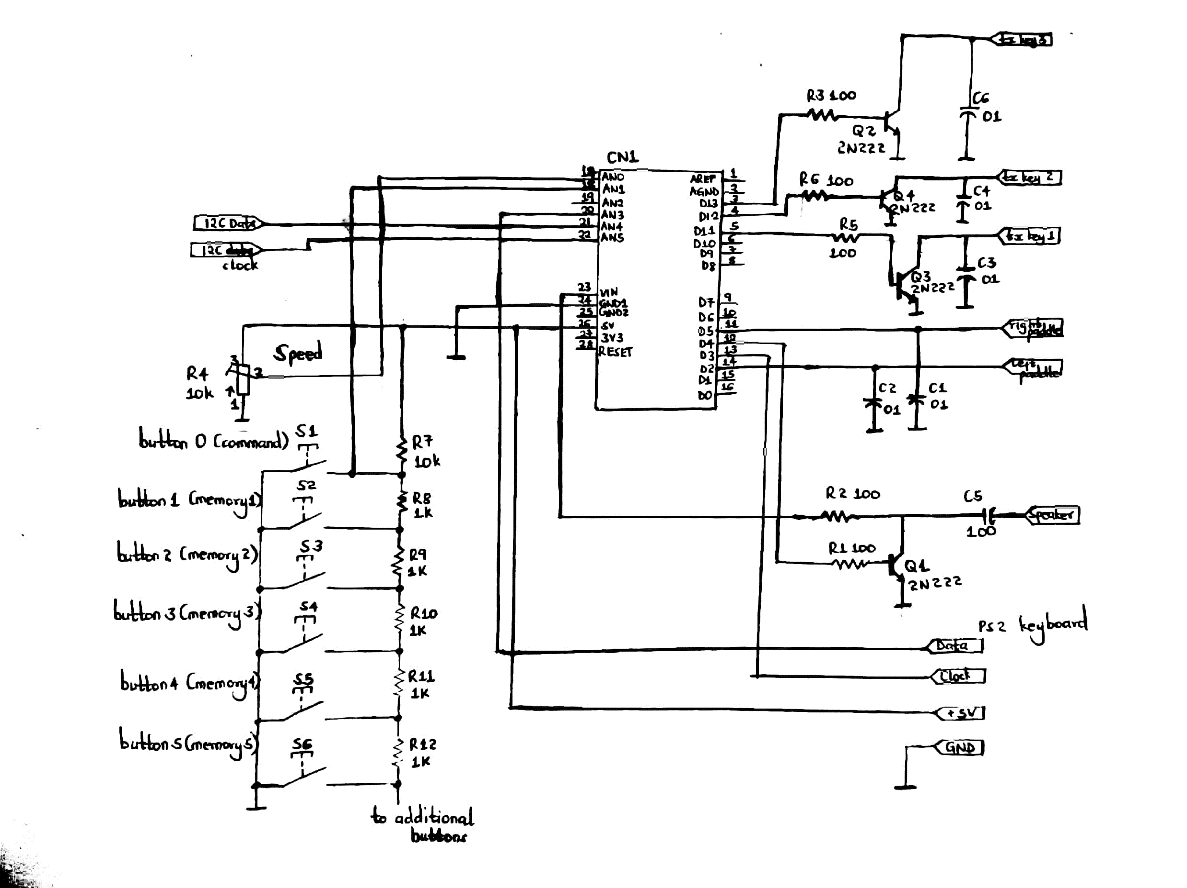
Circuit Diagram of a k3ng keyer
Here are a few things you should note from the schematics;
- First, every capacitor value is in uF (Microfarads) unless the requirements differ.
- Secondly, it’s ideal to use 1K ohm resistors than 100-ohm base resistors.
- You can also use typical tolerance components since none of the values is supercritical.
- Lastly, mainly focus on the numbers inside the box for pin connection like A2 D13, AN1, etc.

Code
The GitHub website provides the source code. Therefore, start by clicking the button written Download Zip located at the lower right part of the site. It’ll enable you to get a ZIP file with all codes.
k3ng keyer kit
A k3ng keyer kit has the following composition;
- An Arduino UNO e.g., Arduino Mega 2560 pro mini
- Inputs, e.g., paddle input, memory buttons, keypad, etc.
- Outputs like Audio output, Keyer outputs one and two
- Indicators/Displays, e.g., I2C, LCD, and LED
- Components like buttons, headers, transistors, capacitors, and resistors
Projects using K3ng Keyer
The K3NG keyer project we’ll discuss today has an Arduino architecture. In our case, we have a Mega2560 board since it can withstand several Keyer options. In addition, you can use the UNO board with a minimal option set. The project further involves fitting a keyer shield board into the Arduino.
We are using two software;
- An Arduino software, 1.6.5 version
- K3NG keyer software
Components required
- Keyer shield board
- Key connections
- Potentiometer
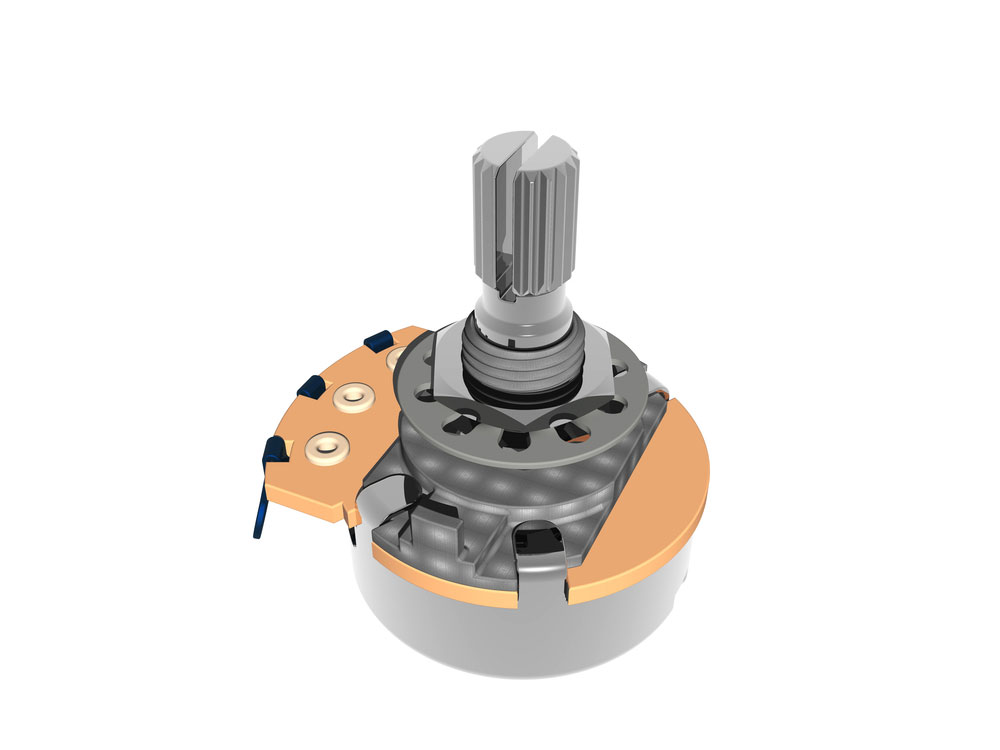
(potentiometer)
- Paddle connector,
- PS/2 keyboard
You can also include the following in your connection points;
- PTT,
- External push buttons, and
- LCDs
Finally, you can use programmable connecting options like an external speaker and switchable sidetones.
Conclusion
We’ve come to the end of our article, and we hope you’re now well conversant with the k3ng keyer device. If you still have questions or need any clarifications, kindly reach out to us.


