Contents
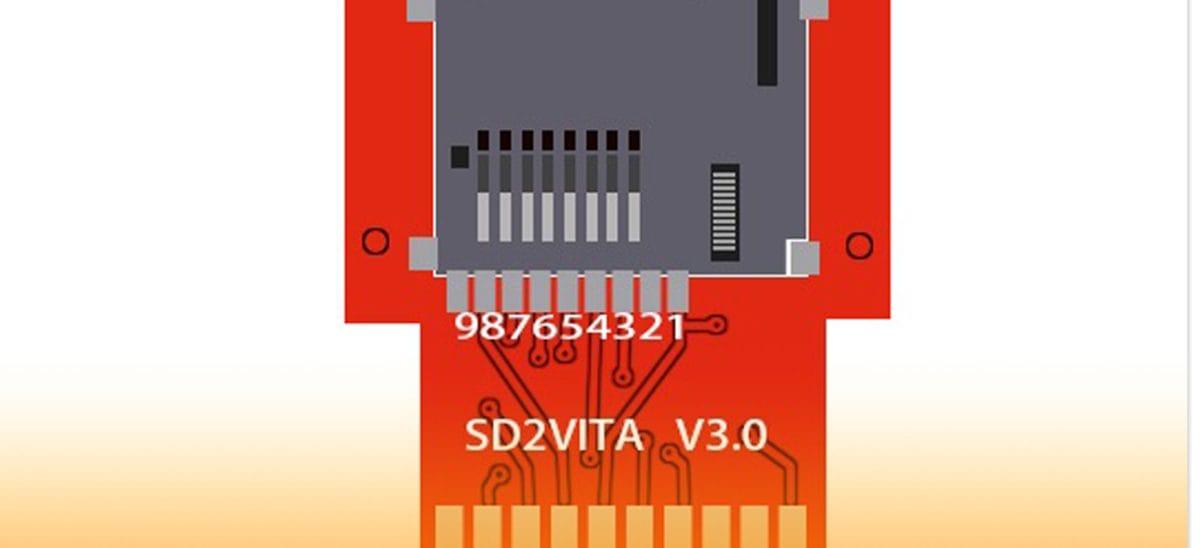
So, What Is SD2Vita?
Definition
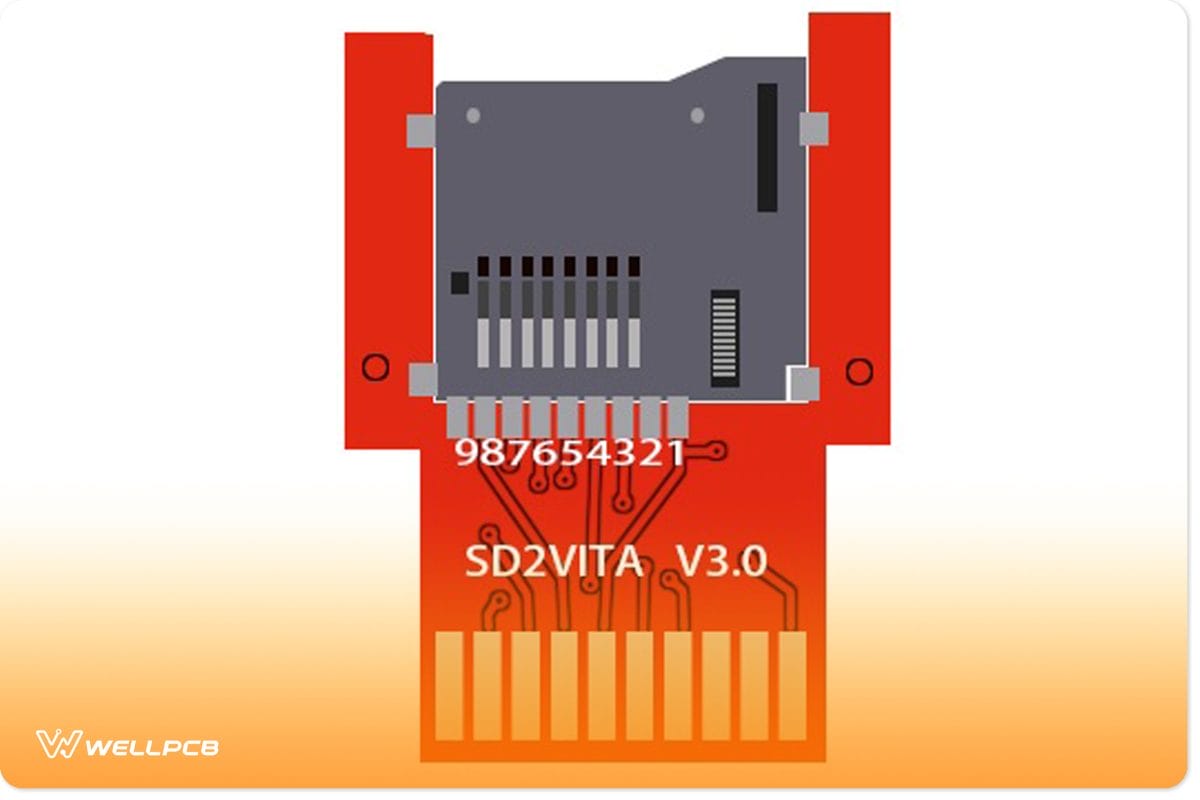
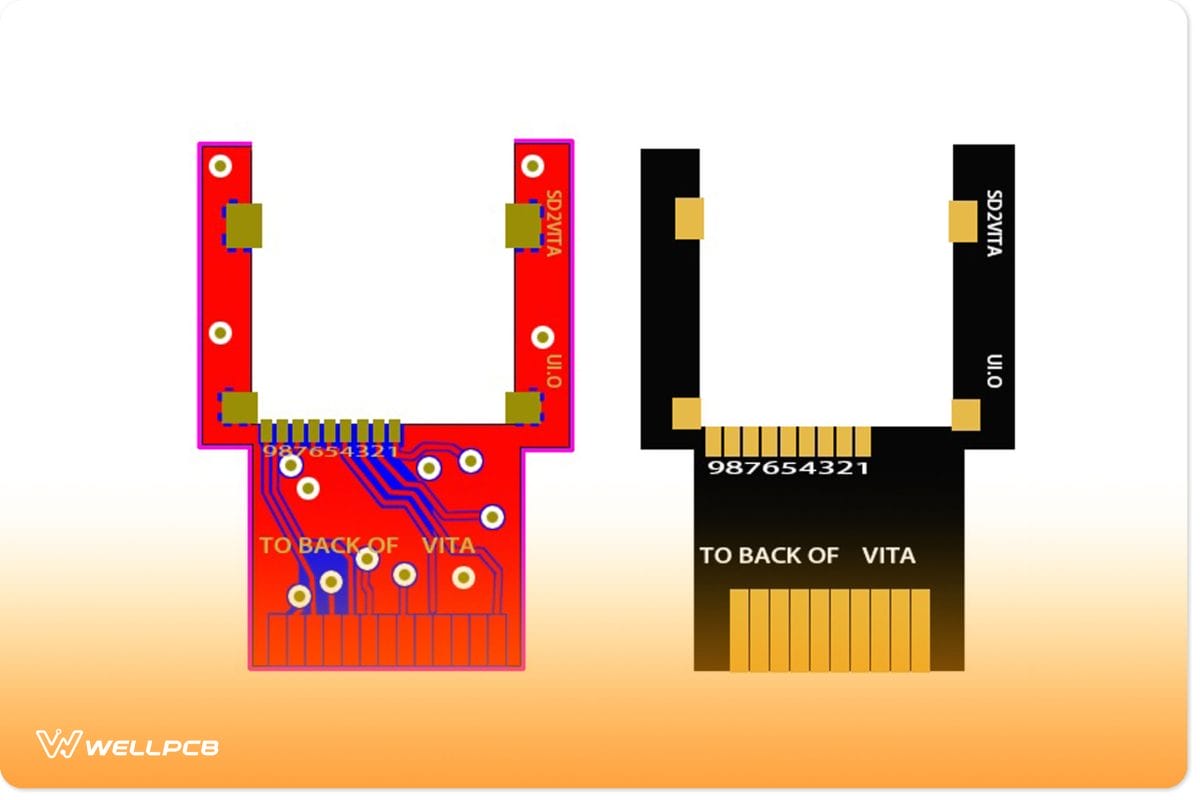
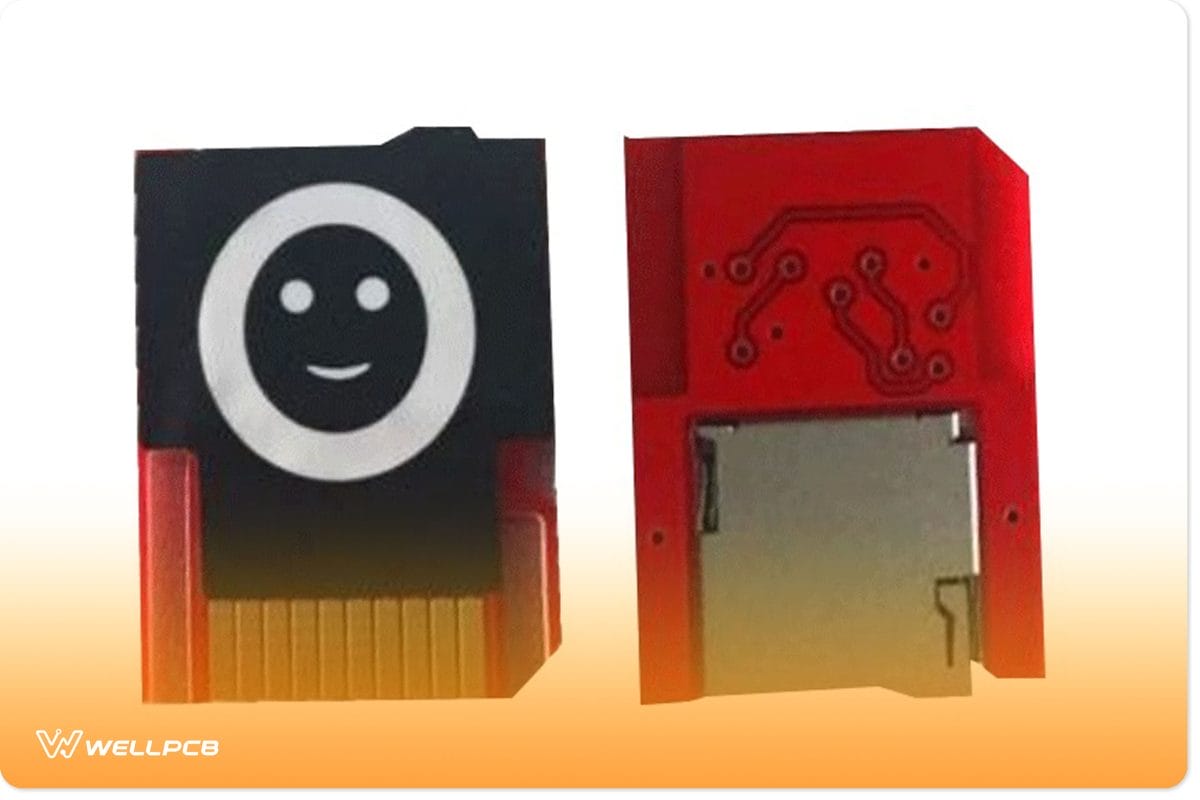
As already highlighted, SD2Vita is a Micro-SD adapter designed for use in a regular PS Vita game card slot.
The SD2Vita adapter allows gamers to use a standard micro-SD card rather than Sony’s PS Vita memory card.
A the moment, SD2Vita is available in versions 3.0 or 5.0.
Also, these adapters run on the standard PS Vita firmware (version 3.60 or later).
Because of this compatibility, you don’t have to scratch your head repeatedly to find compatible software accompaniments.
Something About PS Vita
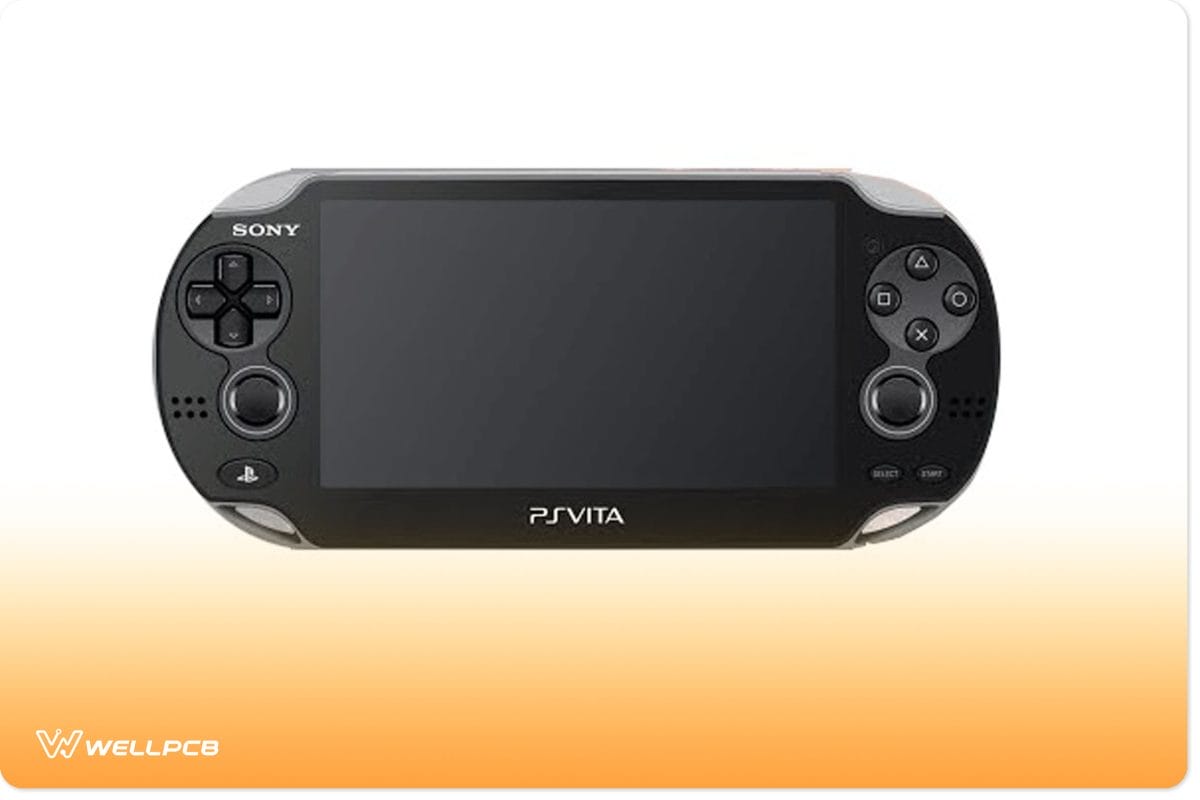
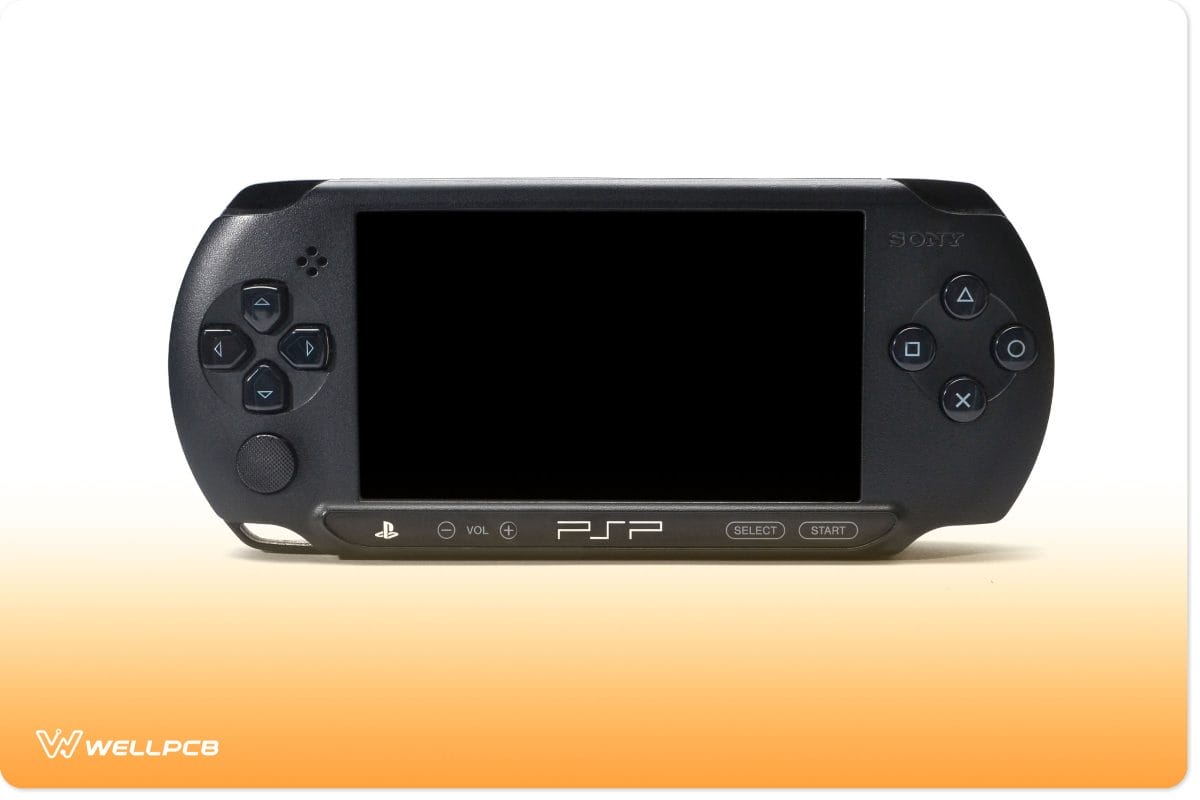
The Play Station Vita (PS Vita) is a portable, hand-help play station console produced by Sony in 2011 as part of their larger plan for the 8th generation of Video games.
This device became famous for transferring the PC gaming experience to a portable device.
SD2Vita is a memory card adapter designed to use the PS Vita card slot instead of the proprietary Sony Game memory card.
Because SD2Vita is compatible with Sony’s firmware, everything else is set.
Other vendor software applications make modern gamers prefer SD2Vita over Sony’s proprietor cards.
These factors lead us to our essential question: why should you consider going the PS2Vita way?
Is SD2Vita For Me?
As we shall observe in the later chapters of this edition, SD2Vita has awakened incredible community support and popularity among gamers in modern times.
Consequently, the increase in polarity has pushed the demand for SD2Vita adapters, which directly dictates their production.
Moreover, when a particular PCB’s output increases, it interests PCB engineers.
While doing a short online review, I noticed a few compelling reasons that back the popularity of SD2Vita.
The three principal reasons that make most gamers love SD2Vita include:
More Storage space
SD2Vita adapters allow players to use their ordinary micro SD cards instead of Sony’s proprietary PS Vita micro SD.
These adapters currently support up to 256 GB of storage space.
Because of this, gamers can quickly increase their storage space by buying standard Micro SD cards with more storage capacity.
User Preference And Freedom
Look. Find PC games more interesting the more freedom accorded to me.
For instance, I adored a game because it allowed me to drive virtual cars like crazy and make accidents like I was acting in a ” Fast and Furious” movie.
Moreover, then came a different one that allowed me to shoot like a freaking terrorist. Oh boy! Ulp. Those are my ideal games.
Besides the freedom to break the rules in the gaming environment, I also fancied running the game on multiple devices with different computing abilities.
That was my (personal) view of an ideal computer game. However, looking through other gamers, I noted that most of us as players share a similar taste of “freedom.”
Now, think about it: would gamers love to be tied to using only one type of hardware? I guess the d .) Isn’t it the nature of players to try out whatever is new and exciting?
SD2Vita shifts the attention of SD storage from Sony’s standard cards and allows gamers to adopt cards that suit their preferences.
This aspect allows more PCB designers to be crafty and intelligent to woo more sales.
Cheaper
Though the cost of SD2Vita adapters keeps changing, these adapters have proven to be cheaper to buy when compared to the regular Sony Micro SD cards.
Of course, there is always a tradeoff with this reduced price as some adapters may be incompatible with some PS Vita gamepads.
Even so, most of them are above the bar.
Verdict
However, then, our question was: Is SD2Vita for me? To be honest, there is no fixed answer to this question.
To most people, the idea of adopting new technology is often met with some doubts.
However, maybe a good study and comparison of the advantages explored will help you decide whether to go with the SD2Vita technology or not.
If you feel like you might want to adopt it, I advise you to stick around for the following few chapters as we explore the installation and a few hacks of the technology.
SD2Vita Setup
Though the advantages of using SD2Vita somehow outdo the cons of adopting the technology, there is more to installing the PS2Vita adapter than meets the eye.
This process involves three main steps: determining the version of the SD2Vita adapter, formatting the storage micro-SD card, and installing a few software applications.
Before we begin the installation process, let’s review the requirements for setting up a new SD2Vita adapter.
SD2Vita Setup Requirements
1. the PS Vita NKaku ns Firmware: Ensure you download the appropriate PS HENKaku firmware for the SD2Vita adapter.
At the moment, opting for versions later than 3.65 could be recommended.
Also, consider checking our “Tricks and hacks” section for a collection of other vendor applications, like AutoPlugin, that could be helpful during installation.
2. the SD2Vita adapter: You should also order a few SD2Vita adapters. Currently, the main versions of SD2Vita are 3.0 and 5.0.
Due to their popularity, these two versions have broad community support from gaming forums.
Because of this, you are often likely to receive aid whenever you get stuck using these adapters.
Also, as I had noted from the beginning, SD2Vita still exists as a blue ocean without much competition but is prone to constant and frequent improvements.
The later versions (SD2Vita v3.0 and v5.0) are better materials than their predecessors.
They can also support more vendor applications and tricks to make gaming more enjoyable.
3. Micro Cars): You’ll need a standard micro-SD card to store games and setup files. D2Vita supports up to 6GB.
SD2Vita Firmware Installation
Once you have gathered the three required components for setup, now proceed as follows:
Steps:
1. Move the UX0:tai folder into the UR0:tai folder and delete the original UX0: Tai. Once the card is inserted, the UX0:tai folder allows you to use the SD2Vita adapter.
The UR0: Tai, on the other hand, is the folder that acts as the Vita’s internal memory for slim FAT models and PSTV models. Therefore, this step is critical, as it helps eliminate path-related complications when using SD2Vita.
2. download SD2 ita adapter drivers from Github.
3. Download The zzBlank.img File.
4. copy the “ga s. prx” file (including the SD2 ta ad ter drive ) into the UR0:tai using the VitaShell through USB.
5. pen the “co ig.txt” file in UR0:tai. w add the xt “ur0:tai/games.skprx” immediately after the line with the word *KERNEL.
6. Make a backup of the UX0:tai folder on your computer. This step is essential as we will require it in the preceding stages.
It is also necessary as you may encounter installation challenges in the later grades and might need to repeat the steps from the beginning (if you don’t make the backup now).
Also, if you are operating through the VitaShell USB, it is advisable to ensure all the hidden files are visible before making the backup.
7. ow, install the zzBlank setup into your micro-SD card in the steps guidelines below.
Setting Up A Micro-SD card for SD2Vita Adapter
Micro-SD Card Setting Up In Windows Operating System
Steps:
1. download an appropriate Windows disk image r like the Wi 32 Disk Imager.
2. Install the setup on your computer and run the application on.
3. choose the option of making a new disk, I’m going to.
4. Select the z-lank. img that you downloaded earlier as the source for the setup and your micro-SD card as the disk, then click “write.”
5. ang on for a few seconds for the file to be written.
6. Once you are done, eject the micro-SD card and return it.
7. windows will prompt you to format the drive.
8. form t the dive with the exFAT File System.
9. Once you’ve one this, copy the backup file for the card we made onto the micro-SD card.
10. insert the S card back into the SD2Vita adapter, and the PS Vit reboots the PS Vita.
Micro-SD Card Setting Up In Macintosh Operating System
Steps:
1. Navigate to Disk Utility -> Select Card -> Partition -> Options -> MBR -> 1 partition -> exFAT
2. copy the memy card backup we had made before I o the SD card.
3. Insert the S card back into the SD2Vita adapter d, insert it into the PS Vita, then reboot the PS Vita.
Micro-SD Card Setting Up In Linux Operating System(s)
Steps:
- First, locate the whole-device node in the “/dev/” directory. Or instance it could be labeled as “dev/sda1”. If you are uncertain, use the “mount” command. Sure to lace the da1” with an appropriate bel.
2. mount the partitions without ejecting the Micro-SD.
3. copy the bla k.img file into the SD card in the te minal. E.g. “dd if=/pa h/zzBlank.img of=/dev/sda1”.
4. get the micr -SD card and insert it back.
5 format the S card us ng exFAT. For exam e, type the following in the terminal screen: “mkfs. FAT /dev/sda1.”
6. copy the file backup you made earlier onto the micro-SD card.
7. Insert the S card back into the SD2Vita adapter and insert it into the PS Vi, then reboot the PS Vita.
Congratulations. I’ve Finall Made It.
At this point, your Vita should be able to recognize the SD2Vita adapter you inserted.
Once you have inserted the file, the orange LED next to the adapter should repeatedly blink to indicate that the PS Vita is reading the files in the micro SD.
Additionally, it would help if you observed that the SD2Vita adapter is now mapped to UX0.
If these two indications are shown, then it means that your installation was successful.
At this point, feel free to install more vendor games on your PS Vita. You have fully learned how to set up the SD2 TA adapter.
To run any new vendor games, you will only need to mount them in UX0.
However, there are times when navigation and game compatibility issues may arise.
In the next chapter, we will examine some tricks and hacks that can make your experience with SD2Vita memorable.
SD2Vita Hacks & Tricks
Trick 1: Using Switch2SD2Vita to switch storage between UMA0 and UX0
When using the SD2Vita adapter, most vendor games are installed and run on the UX0. As you might have noted from the installation process, we shifted the default st age from UMA0 to UX0.
Now, there are times that you would love to peek into the UMA0 storage. His step is often limited to rebooting your PS Vita nd choosing the storage as MA0.
The Switch2SD2Vita is an excellent plugin that lets you switch between UMA0 and UX0 without rebooting quickly.
Sometimes, your PS Vita might fail to recognize or run the plugin. In such a case, we advise you to consider an updated version of the plugin (Vers n 2.0 is the latest release) and retry it.
If it fails, you might have to remove the micro SD card from the SD2Vita adapter.
This plugin is advisable as it is open-source. Because of its nature, it has been used by several gamers and addressed several bugs.
Thus, it currently stands as the market’s stable and secure plugin.
Trick 2: Using HENKaku AutoPlugin to install plugins
For newbies to SD2Vita, the ocean is always blue with several plugins that you can use to install applications. However, most of the plugins sometimes fail to wor
This experience can sometimes be very frustrating. ENKaku’s Au Plugin is the ideal plugin for installing games.
AutoPlugin loads with HENKaku (version 3.6 or later), making it easy to locate and use. It is recommended over the games plugin for tall games.
Trick 3: Using NoNpDRM
In the beginning, I insisted that gaming is only fun when you remove restrictions and have absolute freedom to break a few gaming rules.
This plugin will allow you to get around the DRM protection on PS Vita content.
Of course, other favorite plugins (like MaiDump and Vitamin) perform tasks related to the same job the NoNpDRM plugin performs.
However, we recommend this plugin as it is free to download and use (open-source).
Also, it has undergone several updates to ensure its stability and safety when used.
Although the app does not require you to install Enso, it is recommended that you do so alongside the plugin.
To install this plugin, you need to download the NoNpDRM setup files into your Tai folder.
Next, you will need to update the configuration file “config.txt” file within UR0:tai under *KERNEL with the appropriate name of the setup file, e.g., adding “nonpdrm.skprx.”
Conclusion
Here Is My Take
As I indicated initially, the SD2Vita niche is relatively new in gaming and PCB development. However, SD2Vita is a recommendable improvement as it allows gamers to extend the amount of real storage space they can utilize for gaming at a lower cost.
The technology also allows players to explore more games, making the gaming experience exciting.
Now, when analyzing this trend (as a gamer rather than an engineer), I can observe an increasing trend in the popularity of SD2Vita over the proprietary Sony SD cards for PS Vita in many gaming forums.
This popularity can also account for the increased complaints of poorly developed PCBs for SD2Vita adapters.
Like any new technological advancement, SD2Vita was bound to face a few challenges from its onset.
Sure enough, it has suffered several problems in the past and is still likely to face more in the coming days.
However, we have also strived to ensure we manufacture advanced PCBs for SD2Vita adapters. Also, you can order them at a bargain here.
You’ve Got Few Worries? Es, We Can lp
In this edition, we have strived hard to gather and compile some of the challenges we believe may be facing most gamers and questions most sellers of SD2Vita adopters face.
Even so, we think you might still be more concerned about SD2Vita adapters. Feel free to contact us, and we will take the time to listen to your fears.
Also, if you need other PCB printed boards, please contact us for a quotation.