Are you planning on making electronic DIY electronics yourself? Maybe a tiny LED lighting project or a burglar alarm? Then you must also want to give them a professional look, even if you are a beginner, right? Guess what, you can make them perfectly. All you need is the right kind of tools.
Experts or beginners are doing it yourself. Projects are usually unable to accomplish much because of dinky soldering irons and an uncomfortable working place. However, DIY electronics kits are available, which will make your work much more comfortable. Thus, you will be able to create and display your projects correctly. In this article, we will tell you all about DIY electronics and their kits.
Don’t let your electronics passion die! We are going to walk you through some of the best DIY electronics projects and recommendations.
Contents
Introduction to DIY Electronics
1.1 What is an Electronic Circuit?
Electronic circuits are the connections of many fundamental electronic and electrical components using electrical wires. Furthermore, these connections can be either on a breadboard or a printed circuit board.
If you are using a breadboard, then these connections are made through jumper wires. However, if you will use a printed circuit board (PCB), copper lines or pads will do wires. They will smoothly connect any two components. Hence, electronics circuits on PCBs are usually neater and are preferred.
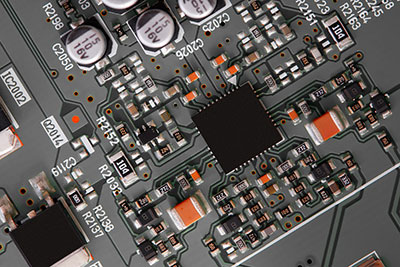
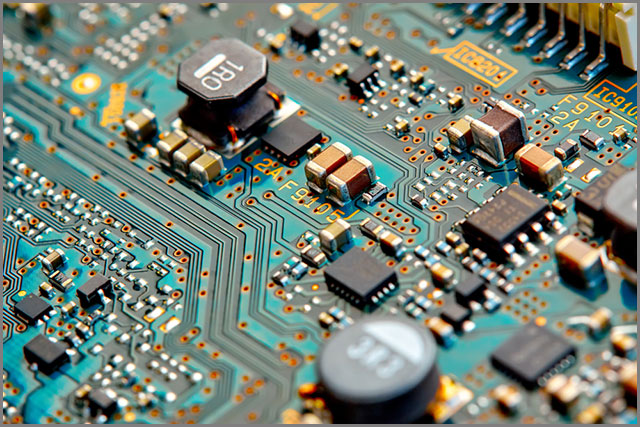
Nonetheless, you need to gain experience to make perfect electronics circuits on a PCB. Figure 1 shows the close-up of a printed circuit board with electronic components connected using copper lines or traces.
1.2 What is DIY Electronics?
You would already know that DIY stands for doing it yourself. So, if you are planning to make electronic circuits yourself, welcome to the world of DIY electronics. And, this is just the beginning of your bright future in electronics and related fields.
As an electronics engineering student, it is crucial for you to do your first project successfully. Even if the project begins to work after a few tries, you will always worry that it may not work tomorrow. Students sometimes get so much disappointed that they start to think about leaving this area.
Hence, we recommend you begin with the easy DIY electronics projects that we have discussed in the next chapter. They will provide you with successful results even on your first attempt. However, it is crucial that you know the basics of circuits and how to connect them on a breadboard.
1.3 List of Simple DIY Electronics Circuits
Before moving forward, we will quickly mention the six simple DIY electronics circuits. It is to give you an idea about what you are going into. They require simple electronic components like resistors, capacitors, transistors, diodes, buzzers, and LEDs. Thus, these components make up the following simple DIY electronics circuits:
1.A Rain Alarm,
2.A Temperature Monitor,
3.A Touch Sensor Circuit,
4.A Tilt Alarm Circuit,
5.Lie Detector, and
6.A Photodiode Alarm Circuit.
The names sound amazing, don’t they? Well, if you already don’t know how to design them, you will know soon. Just keep on going through the chapters.
DIY Electronics Kits
2.1 DIY electronics kits for beginners
For your ease and comfort, we have thoroughly researched the best electronics kits for beginners. In this section, we will mention them one by one, starting from the best one.
2.1.1 SmartLab Smart Circuits
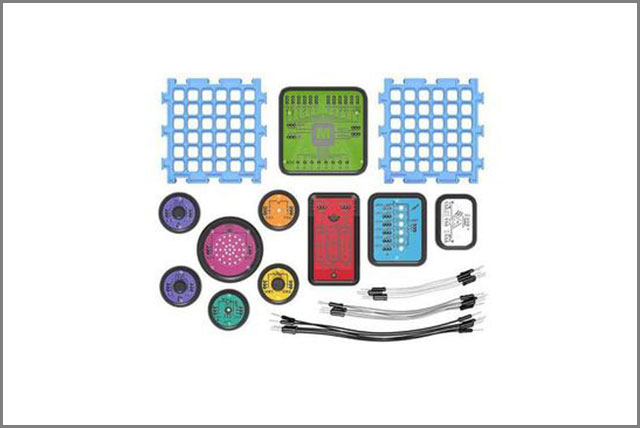
Our top pick is the “SmartLab Smart Circuits” electronics kit. It has proved to be the best even for children from the age group of 7 to 12. As a beginner, you will find it interesting if you plan to try your electronic concepts at home.
The SmartLab Smart Circuits kit will come with simple-to-use parts and an owner’s manual with education instructions. Further, it includes 50 electronic projects that will surely leave you fascinated. Hence, you can make noisemakers, homemade drums, conductivity testers, and so much more. Last but not least, the kit’s components are also robust. You can easily buy it from Walmart or Amazon. Figure 2 illustrates the Smart Circuits kit.
2.1.2. Elenco Snap Circuits Jr.
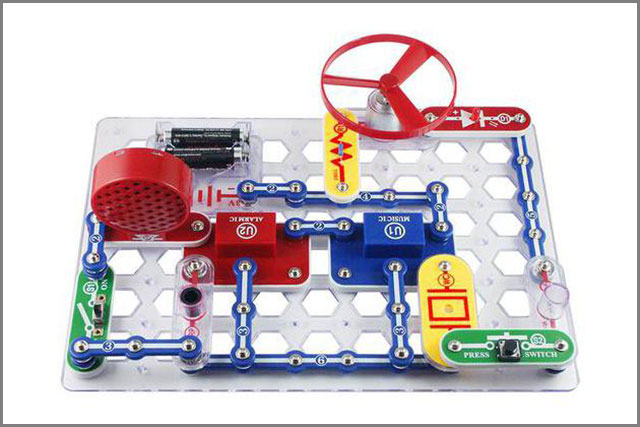
The Elenco Snap Circuits Jr. kit is simple to use and will last for a long. If you couldn’t get your hands on the Smart Circuits kit, you should consider buying this one. Moreover, it is also cheaper than the Smart Circuits kit.
It will offer you simple-to-use parts and different projects that will surely spark your interest. However, its educational instructions are a bit difficult to understand when compared with our top pick. But, eventually, once you get a grip, you will feel that it was not that difficult.
Some of you may also find a few included projects to be a bit boring. But, let’s get fascinated with its other exciting projects. You can make a water level sensor, a fan fly, and so much more. Figure 3 shows this kit, and you can quickly get it from Amazon or Walmart.
2.1.3. Arduino Starter Kit
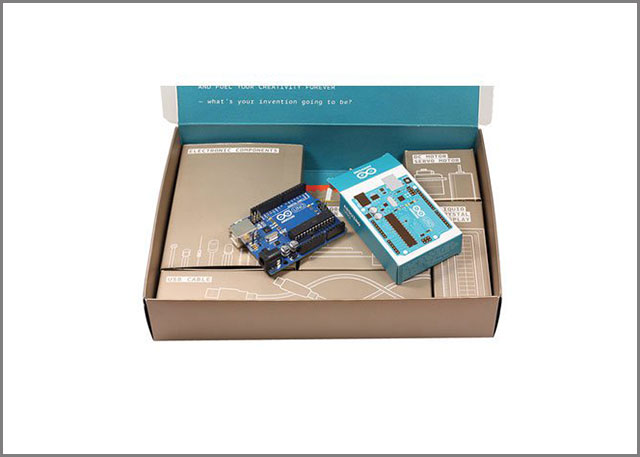
If you are new to Arduino microcontroller and don’t know the wonders it can do. Don’t worry. Arduino Starter kit is the best kit to begin. It will come with a USB cable, one 170 pages Arduino Projects manual, and an Arduino Uno board. Also, the Arduino Projects manual consists of 15 projects.
Furthermore, you will also get a collection of the most used and popular electronic components. Figure 4 demonstrates the Arduino Starter Kit.
2.1.4. Sound Activated LED Kit
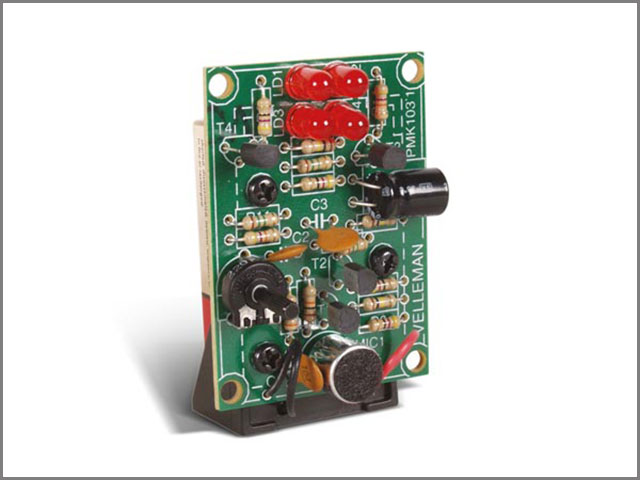
Anyone passionate about electronics would first think of making something with just LEDs. Well, who does not love shiny, bright lights dancing around? This Sound Activated LED kit will light up the LEDs and make them respond to the surrounding sounds. Figure 5 shows this fantastic piece of equipment.
2.1.5. Vein Finder Kit
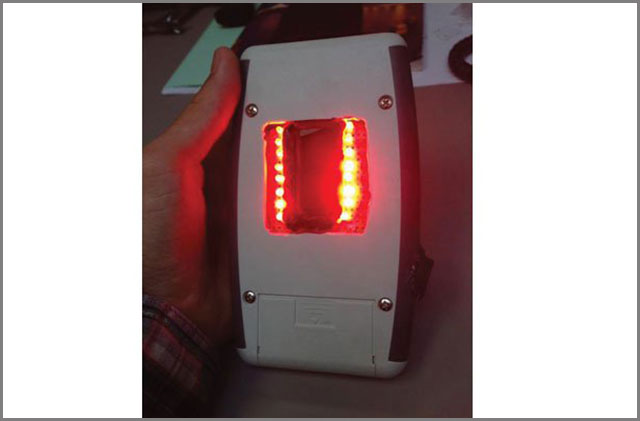
Well, are you one of those who loves to calculate your heart pulse all by yourself? By simply finding the vein in your wrist and listening to the number of pulses it makes in a minute? However, sometimes it gets challenging to find a vein in your body.
Luckily, a vein finder kit exists! Therefore, you can illuminate your veins using this kit. Is not it fun? Yes, it indeed is. So, you can go and buy this exciting and practical vein finder kit. Figure 6 illustrates this kit.
2.2 Common and Useful Electronics kits
It is worth mentioning that you should know the basics of electronics before using electronics kits. Moreover, you should also know about circuits, schematics, transistors, breadboards, soldering equipment, and other essential circuit components. In this section, we will mention the popular and valuable electronic kits.
2.2.1. Car Rear Parking Limit Indicator Kit
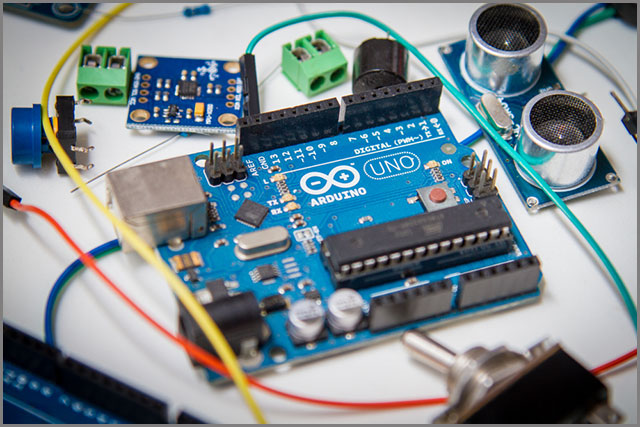
This kit serves to design a project to assist drivers in parking their cars. Hence, you can be avoiding a crash with other vehicles when you are driving your car in reverse. The project will use a LED and ultrasonic sensor for indication and detection of the obstacle. Ultrasonic sensor module will sense the approaching vehicle and will turn on the LED to warn. Figure 7 shows an Arduino board and an ultrasonic sensor.
2.2.2. Fire Detection with Alarm kit
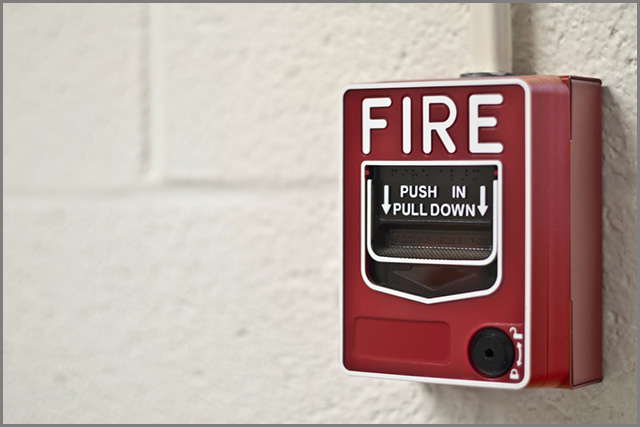
Do you want to get a warning before happening of a fire accident? This kit is for you! Buy this kit and connect a flame sensor. It will help in perceiving the accident and will give a warning by sounding a buzzer. Therefore, your shops, offices, home, firms, and even industries can get more secure. Figure 8 shows a fire alarm mounted on a wall.
2.2.3. Soil Dry or Wet Light Indicator kit
This kit offers a project to supply a suitable irrigation system to agricultural land. So, this will relieve the workforce, and they can rest in this free time. The kit will consist of a pump, a transistor driver, and a soil moisture sensor. The pump will be a fan motor.
Soil moisture sensor de-energizes the transistor driver when the soil is thoroughly wet. That, in turn, will turn off the fan motor. Thus, your agricultural land will stop getting water. Figure 9 demonstrates this kit.

2.2.4. Excess Computer Heating Warning kit
This kit will give an alert if your laptop is heating up. It comprises a temperature sensor, a fan, and a transistor. In short, the temperature sensor module will sense the excessive heat and will drive the fan through the transistor. Thus, the laptop can get cooled down.
DIY Electronics Projects Ideas
In this chapter, we will discuss some easy DIY electronics projects. It will give you ideas about the types of electronics projects you can do this semester.
3.1.1 Peak Detector Circuit
A peak detector circuit is capable of finding the maximum amplitude of any changing signal. For example, you can use them to measure the top sound level and in other similar situations. In a primary peak detector circuit, no complex components are required. So, this DIY electronics circuit can be built merely using a capacitor and a diode. Figure 10 illustrates a rapidly changing sine wave. Observe how the peaks are changing throughout the wave cycle.

3.1.2 Sawtooth Waveform Generator Circuit
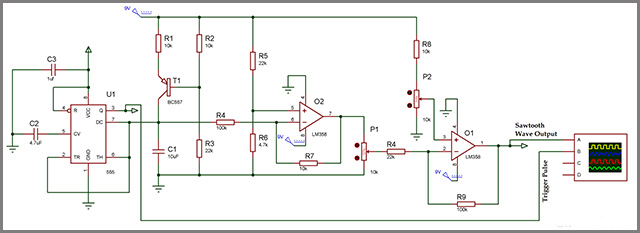
A sawtooth waveform takes the shape of a triangular waveform but is not a triangular waveform. Because it reaches its peak value from point zero and then again suddenly falls to zero. Figure 11 shows a simple sawtooth waveform generator circuit. Therefore, this DIY electronics project can be made using only 555 timer IC, transistors, resistors, op-amp IC, and capacitors.
3.1.3Microphone to Speaker Amplifier Circuit
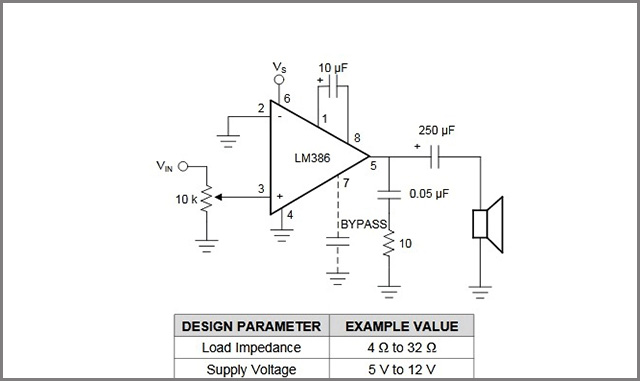
A microphone cannot be directly connected to a speaker. Do you know why? It is because the electrical signal that it produces is not powerful enough to drive a heavy load. Thus, speakers will not make noise if they are directed connected. However, we can add an audio amplifier in between them, and all will work out. Figure 12 shows a primary Microphone Speaker amplifier circuit.

DIY Electronics Components Kits
So, before starting doing any DIY electronics projects, what is the first thing that you need? The DIY electronics components or parts! There are many DIY electronics components kits available in the market. Thus, you can buy them and start doing your first project.
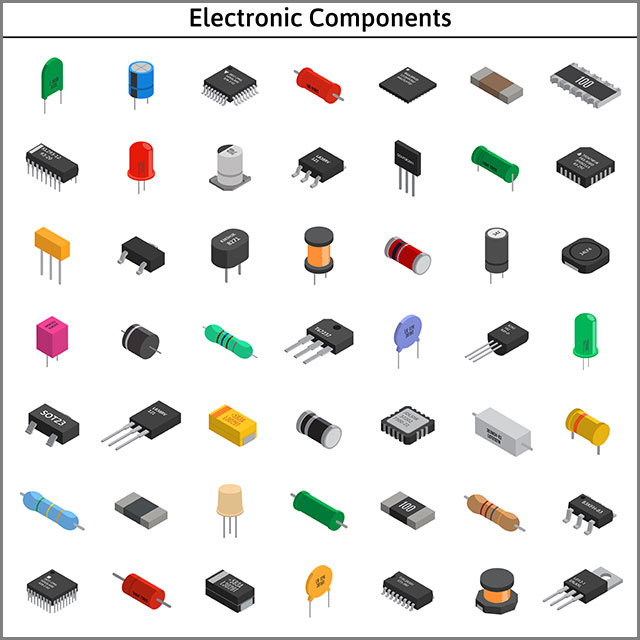
Moreover, it is always good to buy a component kit that includes capacitors, resistors, diodes, potentiometers, and LEDs. These components and other similar essential elements will ideally make your DIY electronics components.
After spending hours researching the best DIY electronics components kits, we have come up with the top five. Hence, the following are the complete five DIY electronics parts kits that you should consider buying:
1.Keywish Electronic Component Base Fun Kit: The included parts are compatible with Raspberry Pi and Arduino.
2.XL Electronic Component Kit: In this kit, you will get 1500 pieces of all parts.
3.Elenco CK-1000 Basic Electronic Parts Kit: It is best for engineering students. And, you will also get an instructional manual with it.
4.SunFounder Sidekick Basic Starter Kit: This kit is handy for STEM programs.
5.EmakefunElectronic Component Fun Kit: This kit offers 200 pieces of components and an instructional manual.
DIY Audio Electronics Projects Ideas
In this chapter, we will mention the best and easiest DIY audio electronics projects. Buckle up; so many exciting projects are coming.
5.1.1 Build FM Radio Using Arduino
Sometimes everyone gets nostalgic and wants to do something that will let them relive the past. So, what comes to your mind when you want to give something a thoughtful touch? It will be a radio. You can buy a radio module and make an FM radio using Arduino.
5.1.2 Play favorite melodies using Arduino
Are you a music lover? Do you know you can ask the Arduino to play your favorite melodies? You will need an Arduino UNO board, a piezo speaker, and a USB cable. Simple code will allow the Arduino to develop various frequencies and play them through the piezo-speaker.
5.1.3 Build an Audio Amplifier Circuit
As a beginner, you can also make an audio amplifier using fundamental electrical components. Operational amplifiers, capacitors, resistors, and speakers can make a perfect audio amplifier. You can use them in-car radios and other similar applications. Figure 14 demonstrates how powerful sound energy can be. The girl is being pulled back.
These are just a few exciting projects that you can make related to electronics. We are sure that by now, you must also be thinking about the various DIY electronics projects.

Conclusion
So, that was all for today. Above, summed up a lot, we hope that can help you, and you will now be able to make DIY electronics projects easily. To sum up, there is no need to panic; buy the DIY electronics kits and get started. You can begin by doing the various projects that we have discussed in this article. And, there is simply no need to visit different websites.
We provide custom PCBs and components & assembly for any big or small electronic projects. Our team of engineers has years of experience and will respond to your queries in no time. Furthermore, if you need any help or ask something, we will be more than happy to assist., contact us at [email protected].