
Contents
- 1 What is a Drone?
- 2 Basic Tools Needed for Building Drone
- 3 Basic Drone Parts
- 4 How to Choose the Right Parts?
- 4.1 How to Build a Drone
- 4.2 Step 1: Assembling the Frame
- 4.3 Step 2: Mount the Motors
- 4.4 Step 3: Mount the ESC
- 4.5 Step 4: Install a Landing Gear
- 4.6 Step 5: Attach the Flight Controller
- 4.7 Step 6: Choose the Right Wireless Remote Control System
- 4.8 Step 7: Connect the Open Pilot to Your Drone
- 4.9 Step 8: Test Your Drone
- 4.10 Step 9: Drone– Takeoff
- 5 Conclusion
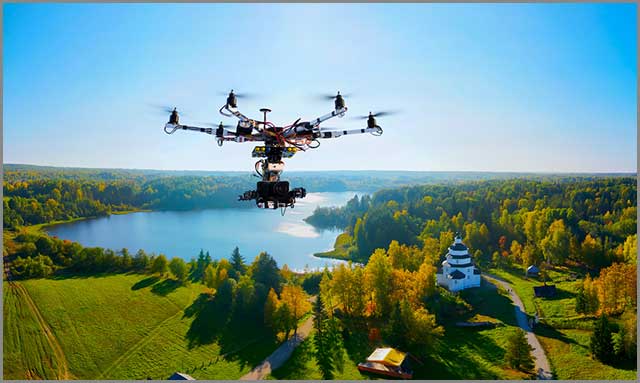
What is a Drone?
Drone Definition
A drone is an unmanned aircraft or a flying robot and is officially known as unmanned aerial vehicles (UAVs). Drone have on-ground based controller that control and communicate remotely with the aircraft.
While the easiest option would be to buy any of the commercially available drones, such as the bind n fly (BNF) or ready to fly (RTF) options, the adventurous tech-savvy would prefer to build a first-person view or FPV drone from scratch.
By the way, you don’t have to be an engineer or an engineering student to build a drone (although that’s a huge advantage). All DIY drone fans can, indeed, enjoy the thrill of piecing together their drones as long as they are patient enough to follow correct instructions.
This essence of this guide is beyond getting a drone kit and soldering together pre-assembled parts. Instead, it is for engineers, designers, and DIY drone fans who genuinely want to learn the various parts for building a drone, how to choose those parts, and the exact steps for bringing together all the parts into one functional drone that can actually fly.
Keep in mind that learning how to build a DIY drone is not the easiest thing in the world. So, no matter how simple the instructions may appear, the truth is that it is going to take some serious work, but the end satisfaction makes it all worth the effort.
Now let’s briefly look at the different types of drones.
Types of Drones
It is important to know that there’s more than one type of drone, just as there are a handful of categorizations (such as design, purpose, size, and others). But let’s narrow our scope to the design of consumer drones. These include:
Single Rotor Helicopter Drones:
These types of drones are also known as heli drones. They rely on only one rotor to remain airborne (heck, it’s even in the name!).
Multi-Rotor Drones:
These are drones with a central body and more than one rotor that power the propellers. Here’s a pro tip: multi-rotor drones are your best bet if you want to have “eyes in the sky.” It is difficult to argue with a multi-rotor drone when it comes to aerial photography because they give you great control over framing and position. The most common types of multi-rotor drones are those with four rotors (quadcopter). Others include tricopter (three rotors), hexacopter (six rotors), and octocopter (eight rotors).
Selfie Drones:
These are essentially small drones with a good-quality camera with facial recognition for snapping selfies. Operating a selfie drone is usually done from mobile apps downloaded on a smartphone. A few examples include DJI Spark, DJI Mavic Pro, Skye Drone, and JJRC H37 Elfie drone.
Racing Drones:
These are FPV drones used in racing competitions similar to a car race, except, of course, this race is in the air. Each participant wears a head-mounted display that shows live-feed streams as they control the camera-equipped drone. Good-quality racing drones include Walkera F210 3D, Eachine Wizard X220S, Holy Stone HS230, and ARRIS X-Speed 280 V2.
Basic Tools Needed for Building Drone

Whether you are only piecing together already-assembled parts or you are building from scratch, you will need some basic tools. Besides, these tools come handy when you need to repair your drone after a crash.
Here are some of the essential tools you will need to build (and repair) your DIY drone.
Soldering Iron:
You will need a soldering iron to join two wires, and also assemble bits and pieces of the drone parts.
Tapes:
These will serve as the much-needed insulator between connectors to prevent shorting circuits and crashing your drone. The options include double-sided tapes, electrical tapes, and Kapton tapes.
Zip ties:
Zip ties are simple yet required to build a drone successfully. ESCs and other hardware are easier to attach to the frame using zip ties.
Velcro:
A strip of Velcro will come handy when you need to attach the battery to the frame.
Multimeter:
You will need this tool to diagnose electrical problems and detect voltage in the different electrical parts. A multimeter is an essential tool if your drone must function properly.
Hand Tools (Hex drivers, Nut Driver / Wrench, Pliers):
These are required tools for securing, modifying, and taking apart the different components of your drone. It is a sheer waste of time to attempt to build a DIY drone without these tools.
Lighter / Heat Gun:
A heat gun is a good option but might not be too necessary to apply heat to heat shrinks around wires. A simple lighter will do the job nicely, too.
Smoke Stoppers:
These are very useful for preventing damages that might occur in case of any short circuit. If there is excess current, the bulb on the smoke stopper will burn out instead of causing damage to your drone.
Tweezers:
You will need these to move small wires and tiny electrical components around. The longer the length of the tweezers, the easier it is to access wires, components, and buttons that might be a bit tricky.

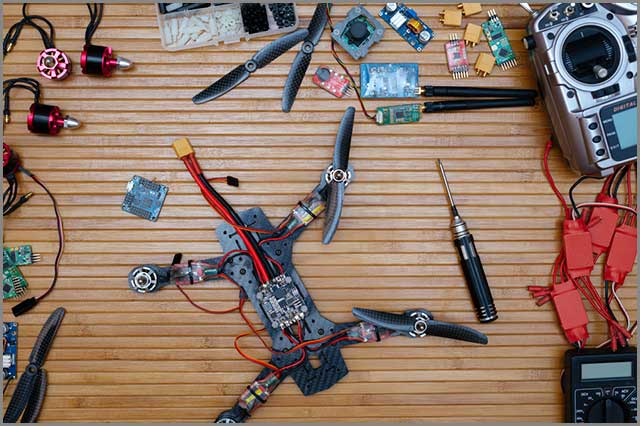
Basic Drone Parts
The components and accessories you need depend on what type of drone you want to build and the function you want it to perform. However, here are the basic parts for building almost any type of drone.
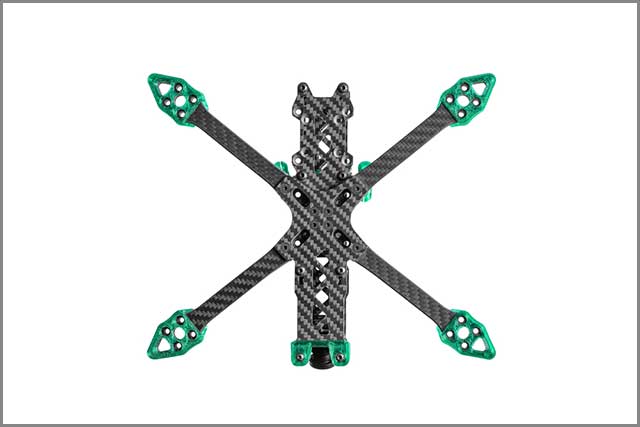
1.Frame:
Everything in your drone rests on the frame. You can build one yourself or buy one. Choose a frame that suits your ideal drone size and remember that the arms should match the number of motors you want to use. For example, buy a frame with four arms if you want to build a quadcopter.
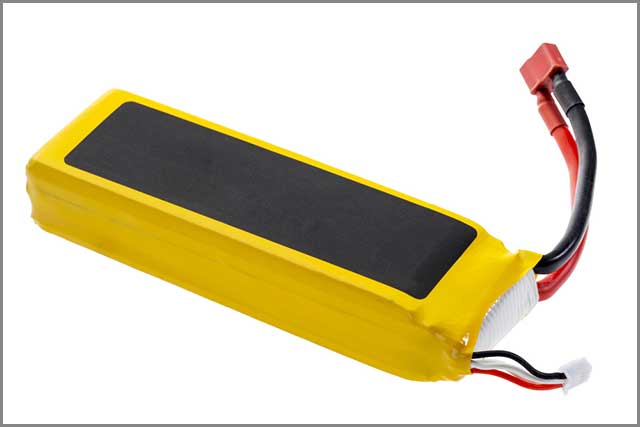
2. Batteries:
Give careful consideration to the type and capacity of the battery you want to use. A Lithium Polymer Battery (Li-Po) is the preferred choice because of its high capacity and output.
3. Battery monitor:
Done can fly without a battery monitor, but monitors can warn you early about battery levels, making them quite useful. You don’t want your drone to run out of juice over a pond!
4. FPV Camera:
You will need a camera to make recordings during flight or take aerial photos. The best drone cameras are 4K quality types. A gimbal might also come handy if you are using a drone with a camera.
5. Connectors:
You need 4.5 mm connectors for welding the PDB and 3.5 mm connectors for the ESCs and motors.
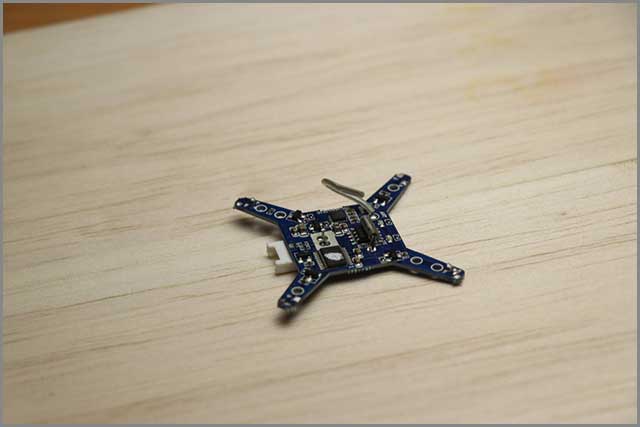
6. Controller:
This is the brain of your drone. The flight controller is the hub for all your drone hardware, meaning it distributes power to all the components and controls the motors simultaneously. Ensure that you choose one with a gyroscope and accelerometer.
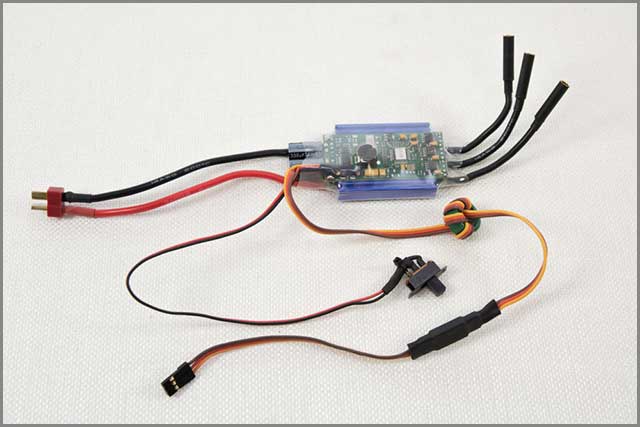
7. Electronic Speed Control (ESC):
The number of ESCs to use depend on how many arms your drone will have. Note that you don’t need ESC if you are using brushed motors.
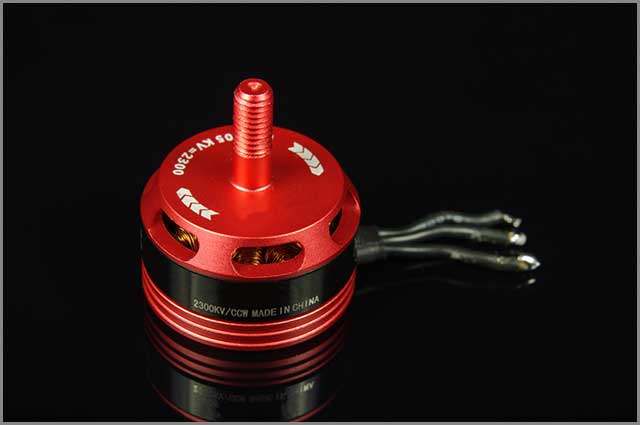
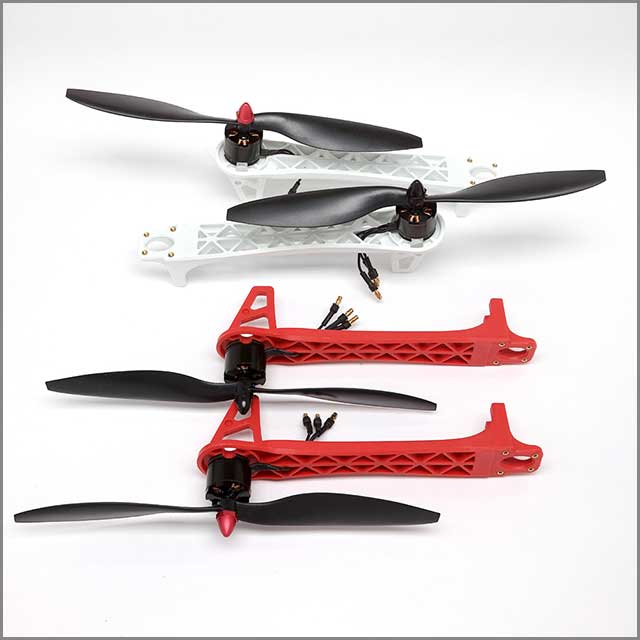
8. Motors:
The number of motors you need depends on whether you want a single rotor drone or a multi-rotor drone. However, the main thing to note about motors is the type. There are two main types, namely, brushed and brushless motors. A brushless motor is a preferred choice for DIY drones because it is easy on your drone battery and lasts longer. Brushed motors are cheaper, though, and are more suitable for ready-to-fly drones. The downside is that they wear and break down faster than the brushless options.
9. Mounting pad:
This will reduce the vibrations during flight, and is particularly useful if you want your DIY drone to take pictures or record videos.
10. Power distribution boards (PDB):
This is the hardware that connects your main electrical components, such as the battery connector and ESCs.
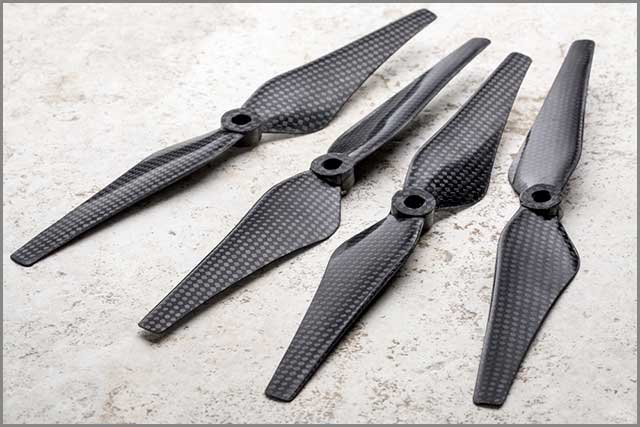
11. Propellers:
Choose propellers that match your drone’s frame. While you can build a frame using wood, you won’t find wooden propellers. But make sure you choose propellers with quality materials that are a good fit for your drone.
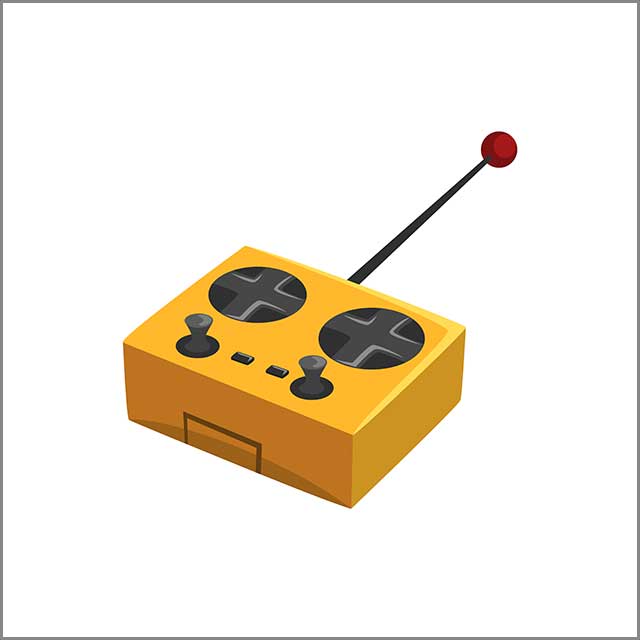
12. Transmitter and RC receiver:
The transmitter is what you hold as the pilot, while the RC receiver remains on the drone to receive commands from you, the pilot. The device plugs into the Flight controller. Choose an RC controller with about five to six channels. The throttle, pitch, roll, and yaw channels will automatically occupy four channels leaving you with two extra channels that you can use for other controls.
13. USB Key:
If you want a drone that will take pictures or record videos, you need a USB key for saving the photos and videos.
You can also include a battery charger and other accessories, depending on what you want to accomplish.
How to Choose the Right Parts?
Your drone is as good as its individual parts, so make sure to get reliable and quality ones from an authorized store.
But anyone can join drone parts together with zip ties and other tools. The question is, will the drone fly and function properly? Your drone can only work as intended if you know how to choose the right parts for it.
Apart from finding quality and reliable parts, you must consider the drone’s thrust to weight ratio. There must be sufficient upward thrust to lift the weight of the drone. You can determine your drone’s total weight by adding the weight of all the components that go into building it.
For this small aircraft to fly successfully, you need to choose the right motor, propeller size, and of course, the correct battery to power the drone. This is the simple way to provide sufficient thrust, and it is among the most important factors that will determine whether your drone will fly or not.
Without dragging you through all the “boring” details, always choose motors that come with thrust tables. The data will help you decide which motor and other components to choose without dragging your drone down.
A 2:1 thrust to weight ratio is usually ideal for gentle flying, but you should aim for higher ratios (for example, 5:1) if you want to participate in drone races. However, the higher-flying time also means a larger battery (which equals more weight).
Okay, now that you’ve gathered all the parts and are ready with the tools you need, the next obvious step is to start coupling, soldering, and binding the parts together.
How to Build a Drone
There are many different ways to build a drone. The steps and components can vary based on how much of the drone is indeed DIY. But most importantly, the type of FPV drone you want to build will determine how you go about it.
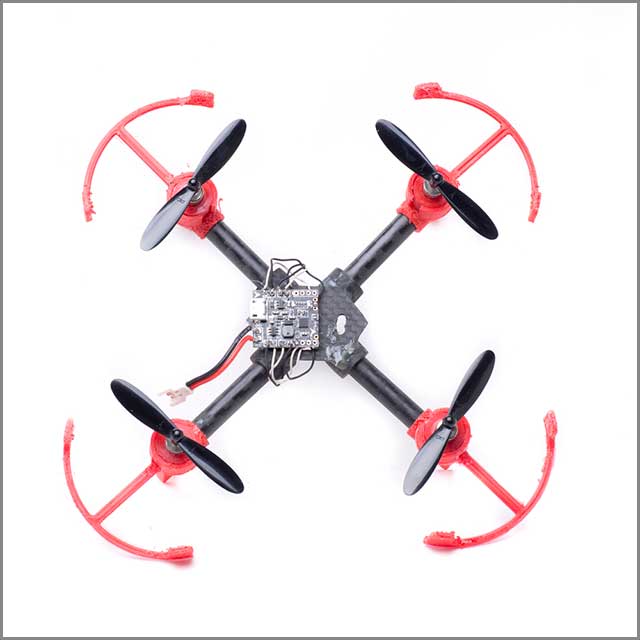
To keep things simple, this step by step guide will focus on the quadcopter or four-rotor drone type for a couple of reasons.
First, it is one of the most popular drone types, and it is pretty straightforward to build. Besides, all drones have basically the same anatomy, which means you can adapt this guide to just about any type of drone you want to build.
Here’s how to build a DIY drone.
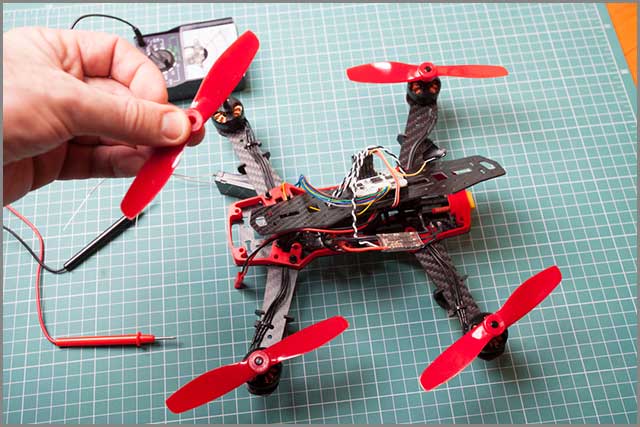
Step 1: Assembling the Frame
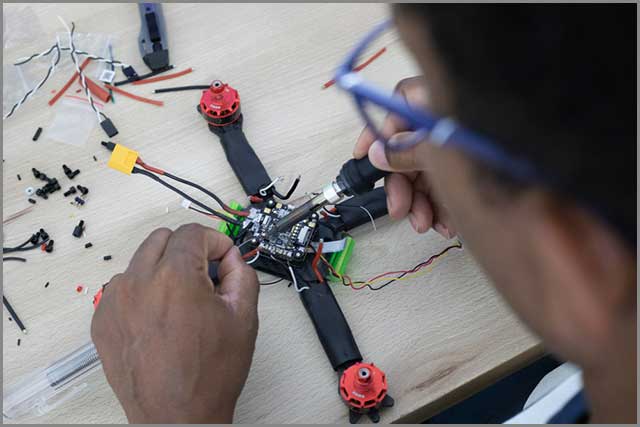
If you are building from scratch, your first task is to choose a material for constructing the frame, and this depends on how rugged or sturdy you want your drone to be. Your options include wood, metal, and plastic. Remember to select a light material even if you are using metal.
Cut out two 60cm long and 30mm wide of your chosen frame material and connect them into “X” shape using glue or nails depending on the material, which is the basic quadcopter structure.
You can also opt to buy a frame for your drone (an easier option) instead of building one yourself. Just make sure you choose a high-quality frame.
The PDB usually goes on top or under the frame. Other components will connect to the power distribution board. Before you attach the PDB to the frame, it is best to make the connections first.
Solder the connectors to your ESCs and motors, after which you should also solder the ESCs and battery pinout, often written as a “pinout” is a cross-reference between contacts of an electrical connector and their functions. There’s a likening of pins as a male connector to the PDB. With all the connectors in place, you can now secure the PBD to the frame using zip ties.
Step 2: Mount the Motors
Drill holes in your DIY drone frame where you will mount each motor. It is an excellent idea to make additional holes to allow for free movement of the clip and shaft if the motors don’t come with mountings. Of course, just skip this if there are mountings in place.
Now, it is time to mount the motors, but you need to watch carefully not to misplace them. Your quadcopter will have four motors; two CW (clockwise) and two CCW (counter-clockwise) motors. Install them correctly, or else you will have less than satisfactory results.
Put the correct motors at the end of each arm and secure them using screws and a screwdriver. Ensure that they are not too tight.
Step 3: Mount the ESC
Next, you need to mount the electronic speed controllers. A good place to connect the ESC is at the bottom of the frame. Doing so will make room on the upper side of the drone for other components.
Secure the ESCs to the frame using zip ties to ensure that they remain in place during flight. Don’t forget to connect the ESC connectors to the motors.
Now will be a good time to test if the CW and CCW motors are spinning correctly. Switch the connections if they are not spinning in the right direction.
Step 4: Install a Landing Gear
Your UAV should land in one piece instead of colliding with the ground when it descends. Landing gears will significantly minimize shock during landing, and your drone should have one.
There is no hard and fast rule about this. Creativity is what is needed here. The goal is to reduce the overall shock when your small drone lands.
But if you need some inspiration, here’s an idea of how to make a good landing gear. Cut a metal pipe into four rings of about 2 cm thick. Use duct tape to attach the rings to the frame. You can also use plastic or any strong but flexible material to create a landing gear.
Step 5: Attach the Flight Controller
Mount a ready-to-use flight controller at the top of the frame near the middle of the drone. You can get a flight controller in drone kits or build one yourself. But only do so if you are sure about it because the procedure is quite tricky and challenging.
The flight controller allows stability and processes the changes in direction during a flight. Make sure to secure it in place by holding it down with double-sided sticky tapes, zip ties, or screws.
The vibrations from the motor can impact the flight controller. Therefore, remember to add a small piece of sponge under the flight controller as you mount it to reduce the vibrations generated from the motor. Doing so will improve the overall stability of your drone during flight.
Now plug in all the wires and other electronics into the flight controller and calibrate the ESCs. This is also a good time to attach the propellers. Don’t install them too tightly as they will automatically tighten if you install the CW and CCW correctly. Make sure that your propellers are pushing air downward when they spin.
Step 6: Choose the Right Wireless Remote Control System
You will need a remote control system to control your UAV. There are quite a few options available, so do your research and select one of the more reliable ones, such as Spektrum, Futaba, FlySky, and more.
You will also need some channels for throttle, roll, pitch, and yaw, including a few more if you plan to use aerial photography cameras. A drone with a camera or some other useful accessory is more valuable than just a flying piece of aircraft. But for your first DIY drone, it is okay to build a simple drone without too many gizmos. There is always room for improvement, so do not overload your first DIY drone.
Step 7: Connect the Open Pilot to Your Drone
Next, configure the flight controller to the ESC and the remote control system. This step involves a lot of assembling, wiring, and programming. It will be helpful if you find appropriate tutorial videos on the web for specific instructions on how to do this for your particular choice of flight controllers.
Step 8: Test Your Drone
Before you put the drone to use, you need to test it to make sure everything works fine. You can check all functions, including sensors and other components, using OpenPilot, MissionPlanner, or any other good GCS software.
Before the test, it is best to remove the propellers. Here’s the thing, you can’t be too sure that nothing will break during the trial. It can be frustrating to start all over again after coming this far. Therefore, removing the props reduces the risk of breaking your drone during the trial.
Find a suitable place to test your small drone. Do this within a controlled distance and pay attention to the cables and zip ties as you test the drone’s movement. Secure any component that seems to be unsteady or move around during the test. When everything works according to plan, your drone is ready for takeoff!
Step 9: Drone– Takeoff
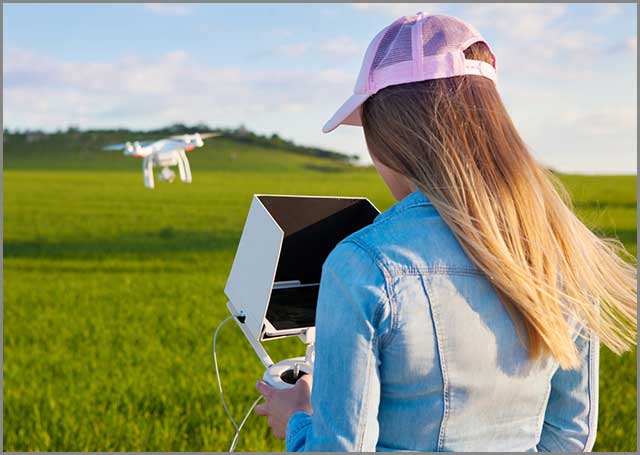
The last step is flying your drone. This is where the rubber meets the road, or in the case, where the device meets the air! Before takeoff, make sure that the battery is safely in place (preferably using a strip of Velcro). You don’t want the battery to move around during the flight. Also, ensure that it is properly connected to all the components, and supplies enough power. Make sure the battery is not half empty before takeoff. You definitely don’t want to run out of power in mid-air.
For your first test flight, find an open area to test your DIY drone. An open area will minimize damage to your small aircraft if it crashes. Also, if anything goes wrong, an open area will limit the potential damage that the drone can cause. Ensure that you test your drone where you can see it throughout the flight session.
Place your small drone on the ground, switch on the controls, and take your first flight. Remember to throttle up your drone slowly, ensuring to keep it at low altitude for a start. Doing so will prevent any serious damage in case your drone goes out of control and comes crashing down.
If you followed the instructions and do your due diligence (and barring any unexpected incident), your UAV should take off smoothly.
Congratulations on your first flight!
Conclusion
This article is about how to build a drone from scratch. There are many factors to be considered, but it starts by knowing the different components and how to choose the right parts. Adding accessories to your UAV, such as cameras, can significantly improve the functionality of your drone. Instead of flying a glorified kite, a drone with a camera can become useful in more ways than one.
The success of your drone design starts with the thrust to weight ratio. Always remember that the best drones are light enough to fly yet heavy enough to remain balanced in the air.
Keep in mind that the real-life procedure for building drones will differ slightly and even include several small or intermediate steps. That’s because the components, accessories, programs, and types of drones vary from person to person. Also, the ways of constructing and piecing them together depend on how simple or complex each individual intends to make their drone.
It is okay to couple parts from an FPV drone kit, especially if you are a complete novice. Doing so will help you get used to the different parts and steps involved and also give you a feel of what to expect when you decide to build yours from scratch.
Your first DIY drone may not be perfect, but practice makes perfect. And the thrill of seeing it lift off the ground is more than enough motivation to build better versions in the future.


