
Are you struggling with tasks that need a high degree of accuracy? Or are you dealing with consistent and repetitive operations that require high precision and performance? Then, you need a robotic arm project.
Also, it’s a reliable electronic PCB device that can perform a wide range of operations. So, you’ll find the robotic arm in different industries like:
- Machine Access
- Laboratories
- Industrial automation
- Manufacturing
Therefore, it will be a brilliant idea to take up the robotic arm project. No doubt, it looks complicated at first but, with all the materials in place, the task will be more straightforward. In this article, we’ll give you details on how to build a robotic arm.
Let’s get to work!
Contents
- 1 What Is a Robotic Arm?
- 2 How Do You Make A Simple Robotic Arm?
- 3 Other Arduino Robotic Arm Project Ideas
- 3.1 The Robotic Arm with Gesture Control (Arduino + Kinect)
- 3.2 A Web Controlled Robot Arm
- 3.3 Nunchuck Controlled Arduino Robotic Arm
- 3.4 Android App Controlled Arduino Robotic Arm
- 3.5 The Wireless Controlled Robotic Hand
- 3.6 The Arduino Bartender Robot Arm
- 3.7 Computer Mouse Controlled Arduino Robotic Arm
- 4 Final Words
What Is a Robotic Arm?
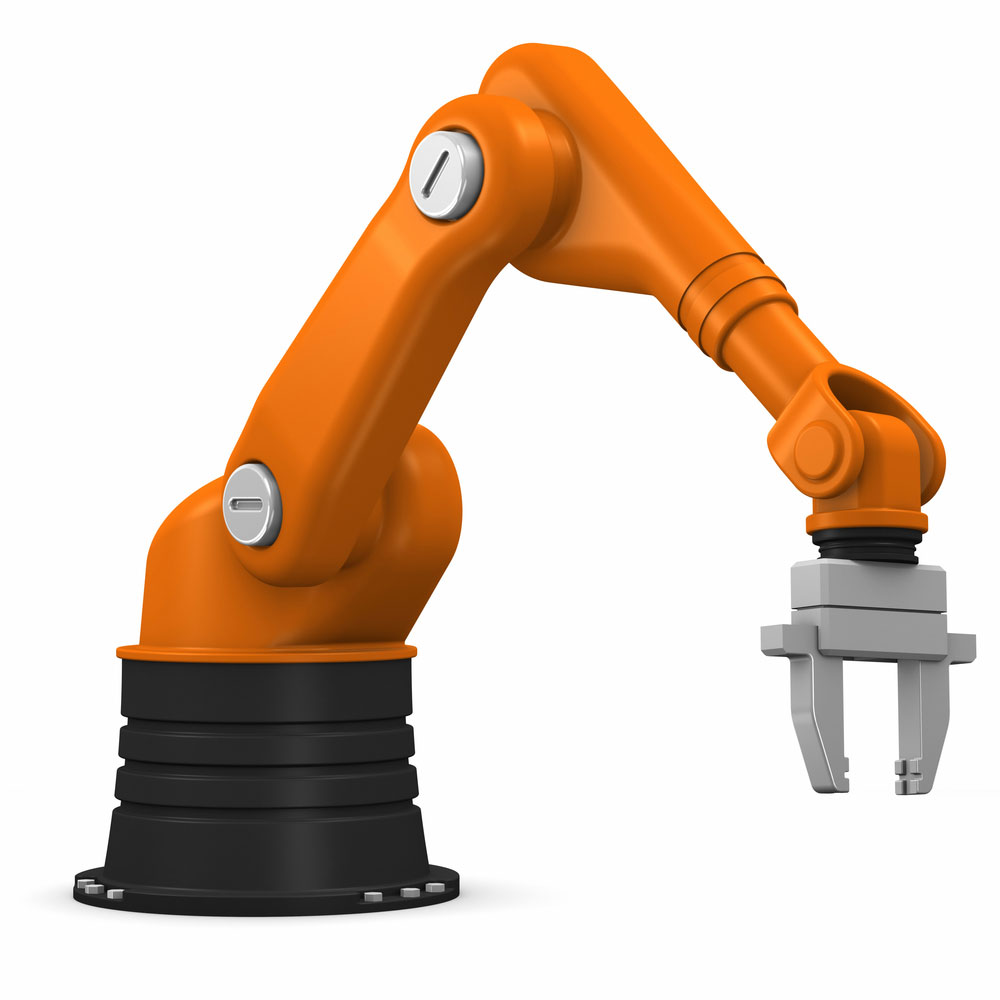
Industrial Robotic Arm
A robotic arm refers to a mechanical tool that you can automate through special software. And you can install the special software on a particular microcontroller. Most times, this device can either be a part of a human-like robot or an independent device.
Plus, the kind of task it performs depends on the motion of the arm’s joint. For example, you can see a robotic arm and robotic grip arm with separate joints that can move in a straight direction.
How Do You Make A Simple Robotic Arm?
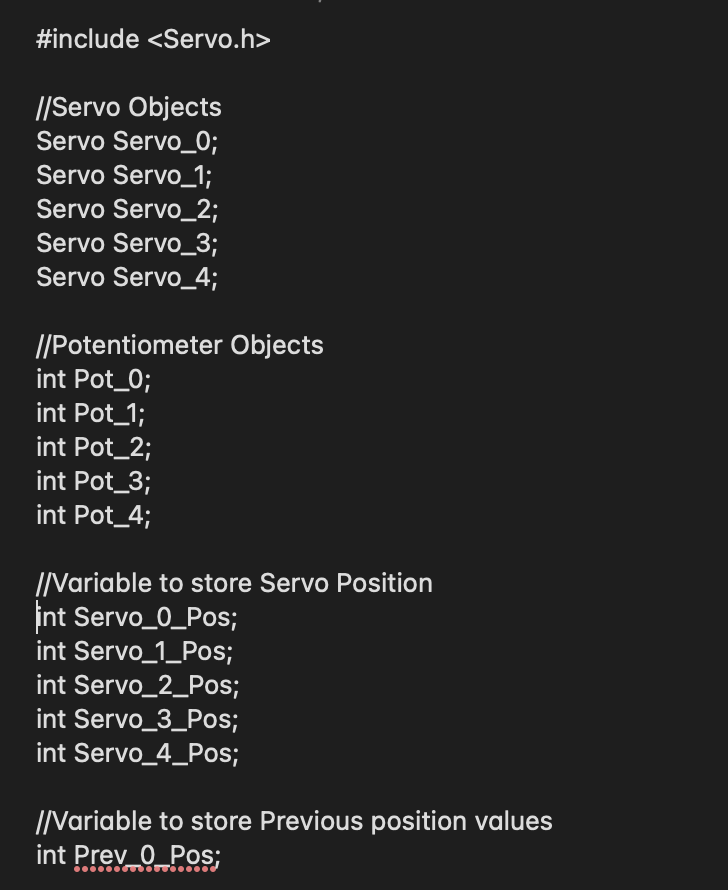
We’ll show you how to make a simple robotic arm that will remember the sequence of moves and play. That said, let’s take a look at the components you need for the project:
A breadboard
- Pieces of Wood
- Installed Arduino IDE
- Servo motors (5)
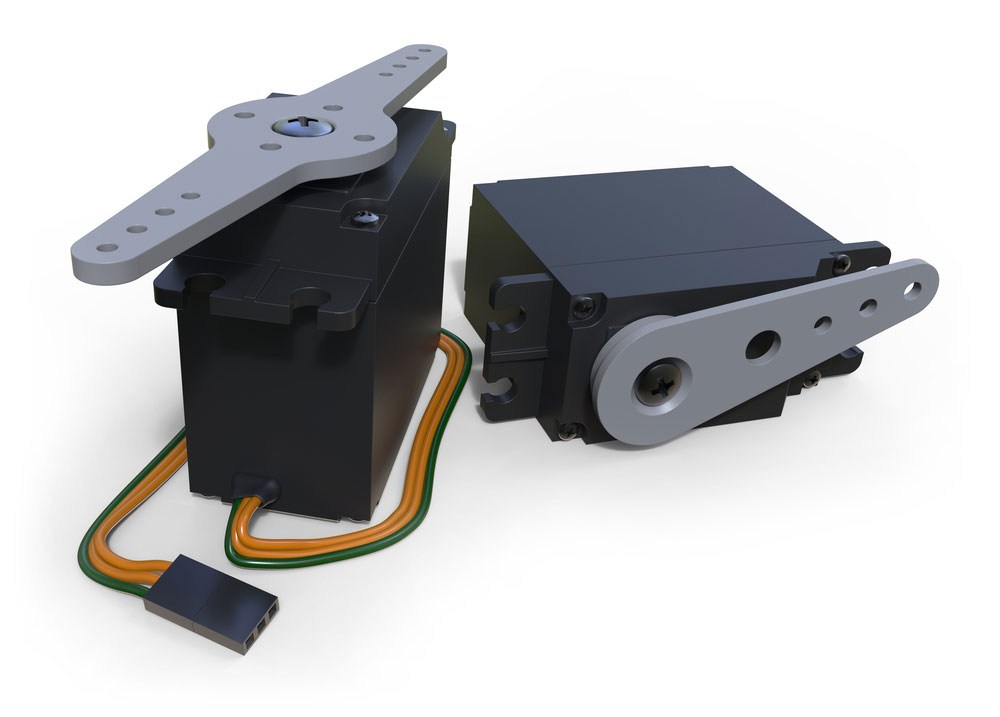
Set of Servo motors
- Arduino UNO
- Potentiometers (5)
- Adaptor (5V 2A)
- Canvas board (A4 size)
- Signal wires
Signal Wires
With this in mind, you can proceed to build your simple robotic arm project in the following steps:
Robotic Arm at Work
Step 1- Start Putting The Pieces Together
The first step is to get a small and stable piece of wood to create the arm. While you’re at, opt for any mechanical design you prefer. Then, stick the servos to your wood with a tape (double-sided). After that, clasp the servos to the wood with screws.
As for the main arm, you can make it by attaching your potentiometers on the small piece of wood. You can use your canvas board as a base to mount your setup.
Step 2 – Connect Your Wires
The goal here is to ensure that you connect all your wires properly. And the first step is to get all your servos. Then, do a parallel connection of the servos to the power source. That is, your black wire should go to Gnd while the red wire connects to the positive.
Once you have that, get your signal wires (orange or yellow) and attach it to the Arduino’s PWM pin. With this, you can proceed to connect the Gnd of Arduino in parallel. Also, you need to attach your potentiometers to +5V.
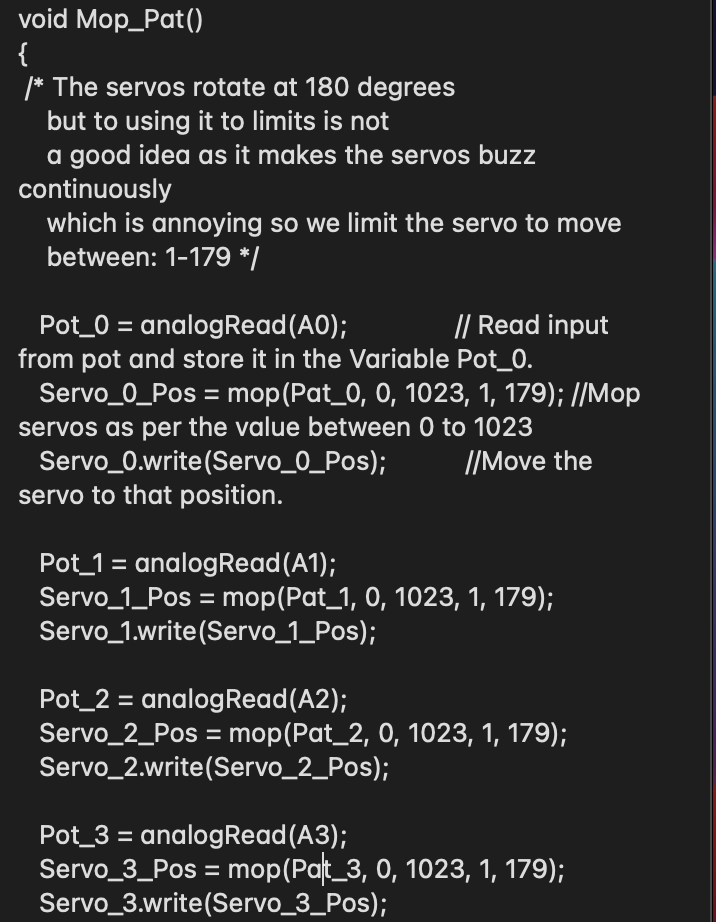
Afterward, attach your middle terminal to the Arduino Analog pin. That said, you can regulate the servos with digital pins like 10, 9, 6, 5, and 3. Plus, you can use the A0 to A4 (analog pins) for input from potentiometers.
Further, the potentiometer that connects to the A0 helps to regulate the servo that attaches to pin 3. Also, pot on A1 controls the servo that attaches to pin 5.
No doubt, the Arduino doesn’t power the servos. But, it’s vital to ensure that you connect the Arduino and GND properly—to make the arm work.
Step 3 – Time to Code
The process of coding for this project is pretty straightforward. So, you can start by storing the potentiometers in an array. When you get the records, proceed to transverse it with a for loop. That way, the servos will handle the steps.
In other words, you can initiate the process by stating all the important variables globally. With this, it’s easier to understand and use the variables in the entire program.
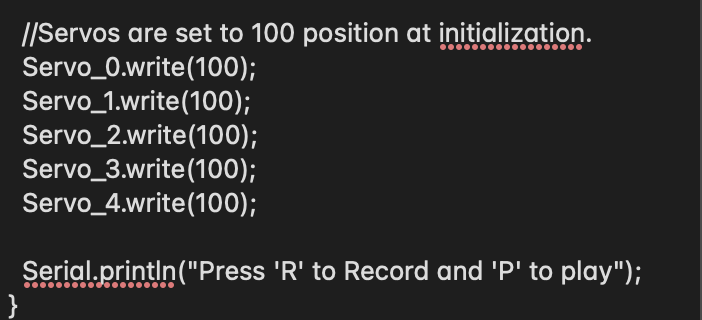
After that, proceed to the major function that initiates the first execution. So, you’ll come up with a setup function that will highlight the set pins and their functions.
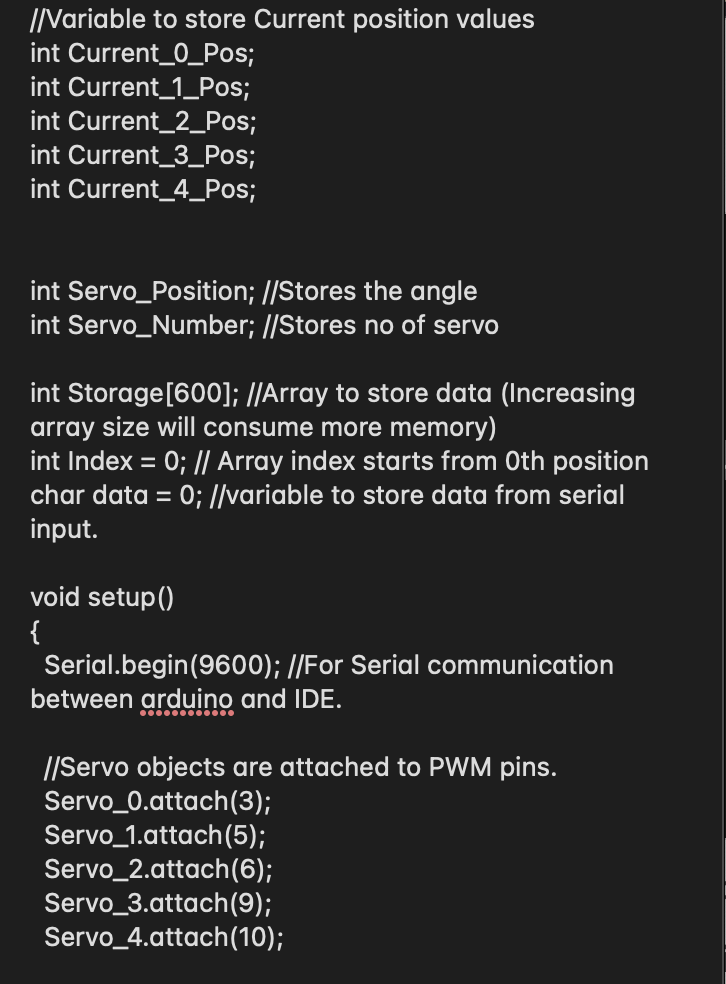
When you have that, the next task is to use the Analog Input pins to get the values of the potentiometer. Also, the Analog Input pins help to map the values—which helps to regulate servos.
Now, it’s time to name the user-defined function. In the code below, we chose Mop_Pat;.
With this, you can put down the loop function. When you finish with the code, you can transfer it to the Arduino board.
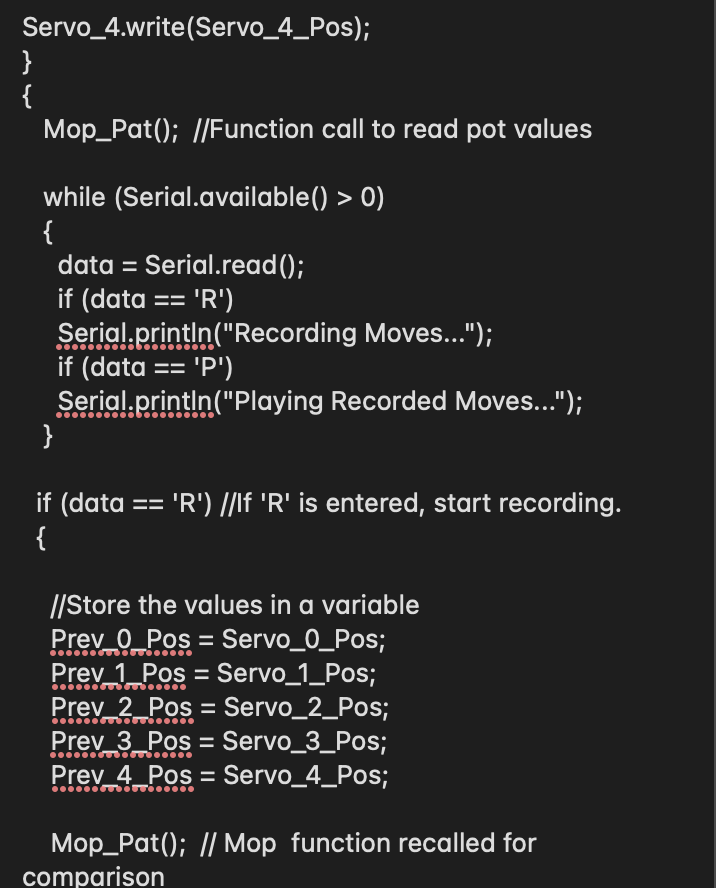
With this in place, your robotic arm will work. Plus, you can do a few tweaks with the code where necessary for a smoother operation.
Step 4 – Test Away
When you finish transferring the code to the board, go to the Tools option. In this option, go to “Serial Monitor.” When you click this function, it will help you reset the Arduino. And it allows you to use the master arm to control the robotic arm easily. However, at this point you can’t record any movement.
So, you have to type “R” on the monitor—to record all the moves. When you have recorded all your moves, type “P.” This function helps to replay all the moves. And the best part is that the servos will keep executing the moves—as long as you don’t reset the board.

Other Arduino Robotic Arm Project Ideas
If you feel like the project above is too basic, feel free to try out other Arduino arm robotics project ideas like:
The Robotic Arm with Gesture Control (Arduino + Kinect)
This project involves directing a robotic arm with gestures. And you can capture the gestures with a Kinect sensor. So, engineers developed the robotic arm to imitate the elbow, right arm, hand, and elbow movement. Plus, they also created this tool with servo motors.
A Web Controlled Robot Arm
Web controlled Robot Arm
The web-controlled robot arm is another remarkable invention. The tool shows you the possibility of coordinating the arm robot with a webserver. Interestingly, an external source powers this device, and it uses about six servo motors.
So, to pull this off, you have to study its workflow, take note of the source code, and understand the system architecture.
Nunchuck Controlled Arduino Robotic Arm
This project idea stands out for its uniqueness. With this project, you’ll learn how to use an Arduino Mega to program the device and mount an arm robot effectively. Also, you can use the Nintendo Nunchuk to control this tool.
And the best part is, the Nunchuk has a lot of sensors. Plus, it’s readily available and cheap. So, if you want to build this robot arm, it’s crucial to get a list of the tools you need and the code.
Android App Controlled Arduino Robotic Arm
Robotic Arm in Production Line
This robotic arm is another tasking project you can pick. The device uses a Bluetooth module alongside the Arduino through an Android app. That said, some of the tools you’ll need to build this robotic arm include a generic motor that has a Bluetooth module (HC-05) and an Arduino mega 2560.
The Wireless Controlled Robotic Hand
Choosing this project is ideal if you want to know what it takes to build a robot hand. Plus, it also teaches you how to control this tool. Further, you’ll need tools like the related sensor, batteries, Arduino board, and servo motor to build this robotic hand with a wireless glove.
The Arduino Bartender Robot Arm
The Bartender robot arm is the project to jump on if you’re looking for a fun project that will impress guests. This tool usually has a RobotGeek Snapper Arm. Plus, it has a valve injector—that boosts its bartending function. So, this project will do a good job moving drinks to your glass from a container.
Computer Mouse Controlled Arduino Robotic Arm
This project is ideal if you love an Arduino arm project that you can control with your computer mouse. The best part is that this Arduino robotic arm can make its decision by processing pictures. How? The tool does it with the aid of Matlab vision software.
Final Words
The robotic arm project is fast becoming a thing in the world. And it’s satisfying to see these devices carry items, balancing and stacking things with precision—based on the type. And they are helpful for medical applications and space exploration.
Robot Arm in Factory
So, it’s an excellent time to build the inexpensive version of this tool—especially if you don’t want to handle any recurring task. Do you need help getting started? Feel free to contact us.


