
Countersink vs. counterbore are particular types of holes that you will need for fixing your printed circuit boards. Yes, you read that right. You don’t need to use the traditional methods to attach materials to your PCB and vice versa. These holes will support various shapes and sizes of screws.
But how do they differ from each other? When should you bore which hole? Can you drill them yourself or need technical assistance? This article answers these questions and much more. Let’s get started.
Contents
1. Definition of Countersink and Counterbore
1.1 What is Countersink?
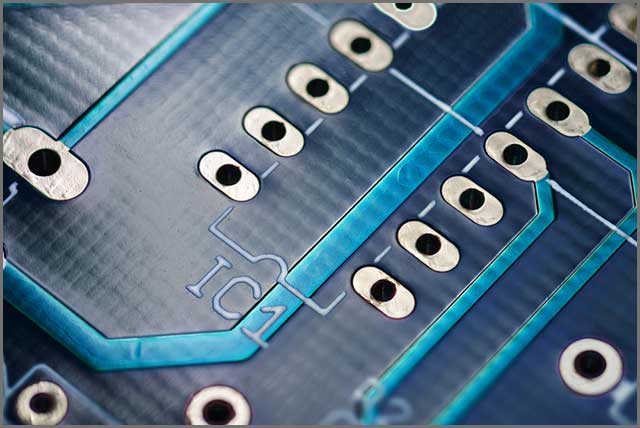
A countersink is a type of hole that is drilled into a printed circuit board (PCB). It is shaped like a cone to permit the flat head of a fastener or screw to fit correctly into the board. Moreover, this hole can have various dimensions of angles. You can bore them in standard sizes of 90, 82, and 60 degrees.
If this doesn’t suffice your needs, you can also drill them in other sizes of 120, 110, and 100 degrees. Countersink holes with chamber angles of 100, 90, and 82 degrees are popular in the market.
1.2 What is Counterbore?
Just like the countersink hole, a counterbore hole is also bored into a printed circuit board. However, it is cylindrical and has a flat bottom. It gets this shape to provide room for a socket head or hex head cap screw. So, if you want to fasten your PCB board using these kinds of screws, you will need a counterbore hole.
Unlike countersink holes, you can drill counterbore holes at only one angle of zero degrees, and that too without affecting the efficiency of holes. This also implies that you can use counterbore holes for only one purpose. However, countersink holes can be used for various purposes because of a wide range of angles.
Figure 1 illustrates the countersink vs. counterbore holes. Observe the difference in their shapes.
So, this was just an introduction to countersink and counterbore holes. In the next section, we will explain in detail the scenarios where you can use them.
2. When do You Need Such Holes?
2.1 Countersink vs Counterbore Holes Use
You can use countersink holes according to their styles. They are mostly for surfaces like metals and wood, but that does not concern us. Let’s get to their use on a printed circuit board. You know that just like many circuit boards, a PCB has holes. And, the method that you use to bore them matters a lot.
Right now, we are concerned with screw holes that will attach the PCB to an application. Your screw type will help you in figuring out flexibility. What will you do? You will need to bore a countersink hole.
This conical-shaped hole will take in a standard flat-head screw. Furthermore, it needs more accuracy when compared with a counterbore hole. After that, you can quickly fix the PCB onto your devices, such as a watch or a smartphone. We have to screw the screws correctly on the PCB.
On the other hand, when it comes to PCBs, it is usually not preferable to sinkholes. You can indeed fabricate them quickly, but a countersink hole retains the smoothness of the board. Additionally, it will not interfere with the alignment of circuit board design. Figure 2 shows a worker fastening a printed circuit board with a screw.

Nonetheless, if you want a stronger installation of your PCB, then you should drill a counterbore hole. Given that you are not concerned with saving space or smooth design. Counterbore holes are mostly big enough to take in socket fixtures. Therefore, you can obtain a more secure placement with its screws.
So, these were few examples of where you can use counterbore or countersink holes. In the next section, we will quickly explain how you can drill such holes.
3. Select Countersink vs Counterbore Holes, Need To Consider
3.1 Information required for drilling countersink holes
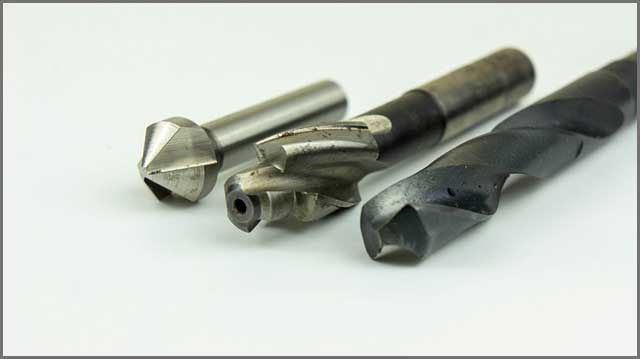
You can drill holes using a countersink cutting tool, as shown in Figure 3. The first tool on the left side is a countersink cutting tool. You will need the following data to drill these holes accurately:
1. What should be the drill angle? Figure 4 shows examples of different drill angles.
2. What should be the significant diameter? It is the width of the hole at the PCB surface.
3. What should be its depth?
4. Where is the sink on the board? At the bottom or top side?
5. What should be the final diameter of the hole’s shaft?
6. Do you need the rod and the sink to be non-plated or plated?
3.2 Information required for drilling counterbore holes
The central cutting tool in Figure 3 is a counterbore, and it is for drilling these holes. Now, the information that you need is similar to countersink holes except for the angle requirement. The hole’s sides are always parallel to each other, so you don’t need to mention the angle. You will only need the following information.
1. The required major diameter.
2. The required depth of the hole.
3. Where is the bore on the PCB?
4. Should the shaft and bore be non-plated or plated?
5. The final diameter of the hole shaft.
So, that is how you can accurately drill countersink and counterbore holes into a PCB. Figure 5 shows a cutting tool drilling a counterbore hole on the left side. The countersunk hole is on the right side.
In the next section, we will mention how you can symbolize counterbore and countersink holes.

4. Symbol Representation of Countersink vs Counterbore Holes
Designers find it more convenient to use symbols for a term rather than spelling it out as a whole. So, countersink and counterbore holes symbols also exist. The letter “V” will represent a countersink hole. The reason for choosing this symbol is that a countersink hole looks like the letter “V” from the side. Figure 6 shows this symbol.

The counterbore symbol is like an incomplete square and is open from the top. Figure 7 demonstrates this symbol. Again, this symbol was chosen by looking at the counterbore holes from the side.

So, designers use these two symbols for drilling purposes. The diameter of the logo shows how deep or wide it the hole should be. Builders or experts interpret these symbols to perform the countersinking or counterboring fastening operations.
In the next section, we will tell you about PCB applications of the counterbore and countersink holes.
5. PCB Applications of Countersink vs Counterbore
A PCB with a countersink hole will provide you with clean placement. So, it is perfect for small devices where you will need tight-fitting. Examples of small appliances will include tiny wearable devices and mobile phones.
On the other hand, PCB with counterbore holes offers security and tight-fitting. So, you can use it on electronic devices and washers. We, here at WellPCB, also provide drill countersink and counterbore holes. You need to place an order on our website, and we will get back to you.
So, these were few examples of where you can use PCB with a countersink and counterbore holes.

Conclusion
Designers are not familiar with the fact that there exist particular types of holes for fixing their PCBs. They are unsure of the best way to attach various materials to their printed circuit boards and vice versa. So, this article has explained everything related to countersink and counterbore holes.
Engineers will now know how they can accurately install their PCBs to a device. Now, you will know when to use these holes and how to drill them. We are sure that we have made your life much more comfortable far, have not we? Still, if you have any queries, feel free to ask us at any time. Our team of specialists is always ready to assist you in any way they can.


